This post presents a chronicle of the construction at each stage.
Barn House M one-story is designed using traditional technology: strip foundations, masonry walls made of concrete blocks, insulated with mineral wool a wooden truss roof. In this case, the investor decided to change the facade material from cladding boards to clinker tiles.
Below, we have attached photographs from each stage of the construction.
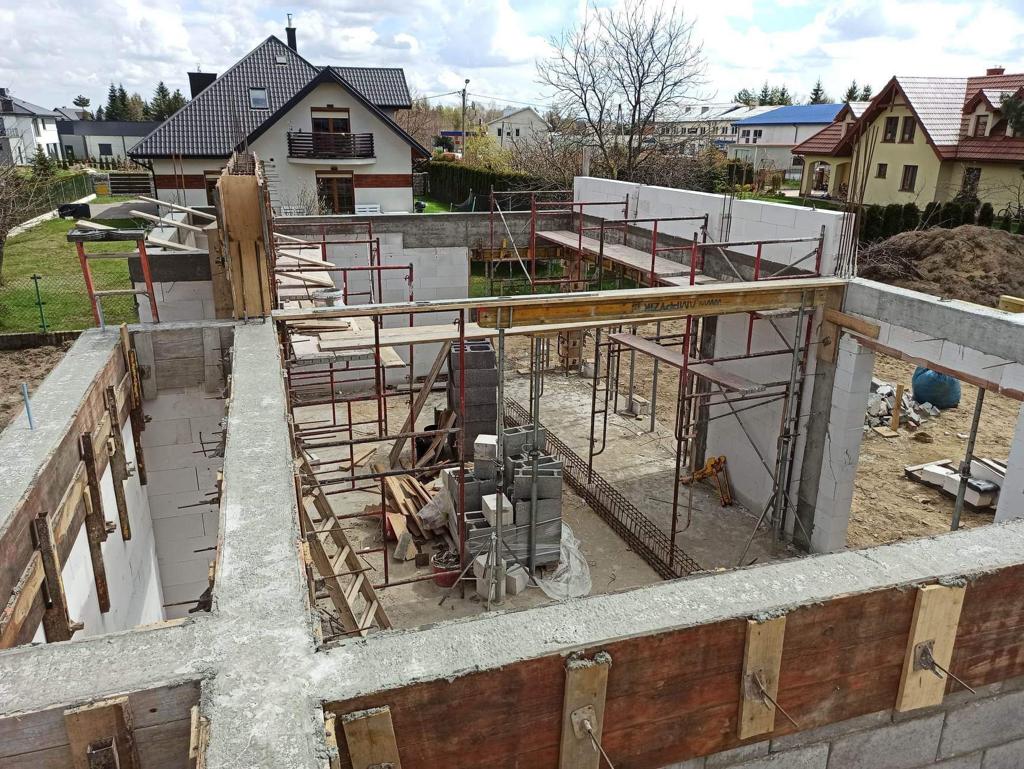
Foundations
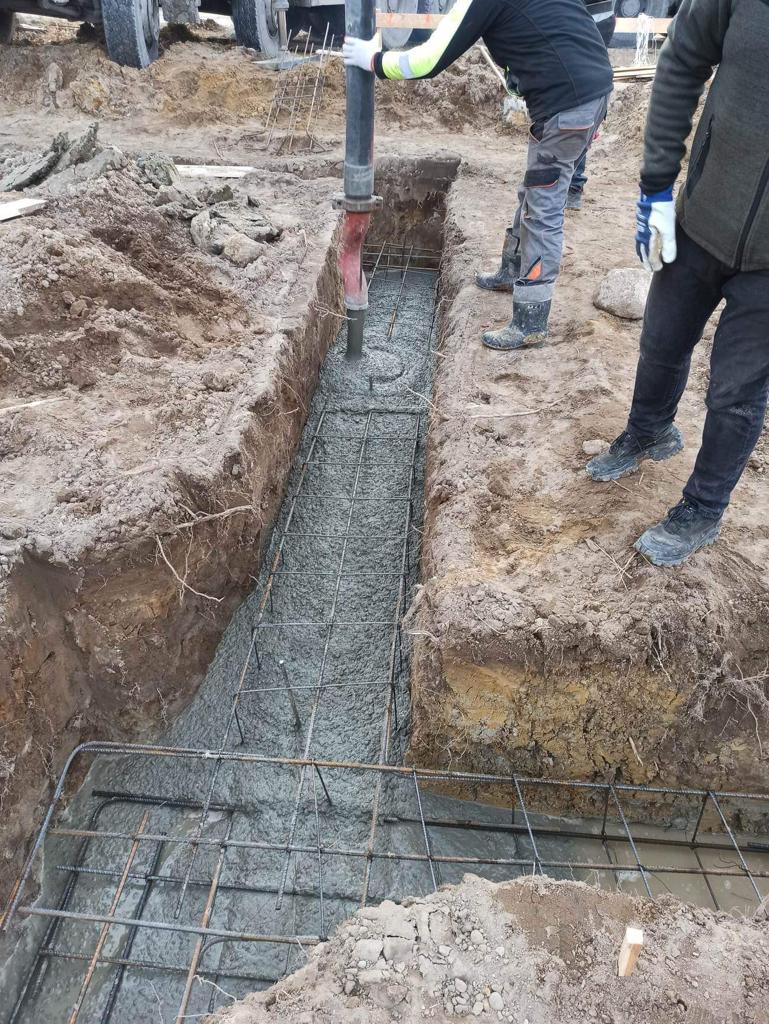
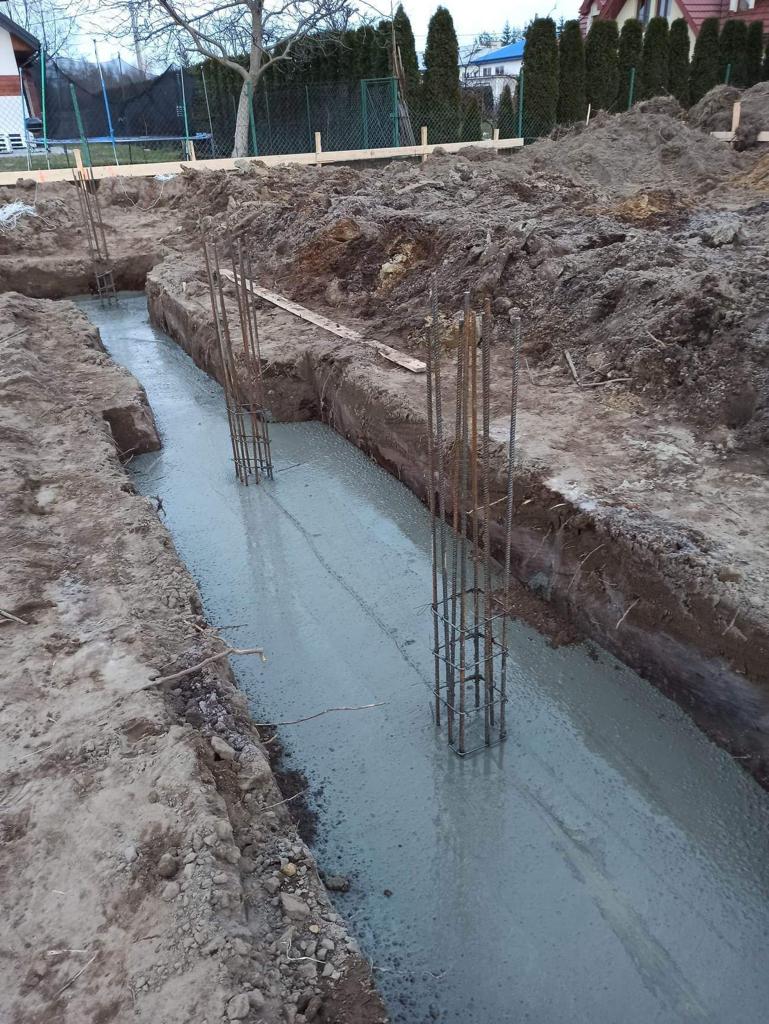

Pouring the foundations is a key stage of construction, during which concrete is poured into prepared excavations or formwork, creating a stable base for the building. This process consists of layering the following stages sequentially:
- Site Preparation – Excavations are properly secured, and a layer of lean concrete or bedding material is placed under the foundation.
- Reinforcement – Before pouring concrete, reinforcement (steel bars) is installed to strengthen the foundation and ensure durability.
- Concrete Quality – It is crucial to use concrete of the appropriate grade, resistant to soil conditions and structural loads.
- Proper Concrete Pouring – Concrete must be poured evenly and under suitable weather conditions, avoiding excessive sunlight or frost.
- Compaction – During the pouring process, the concrete must be well-compacted (e.g., using vibrators) to avoid air bubbles.
- Curing Time – After pouring, the foundations need adequate time to set (at least 28 days) to achieve full strength.
Floor on the ground
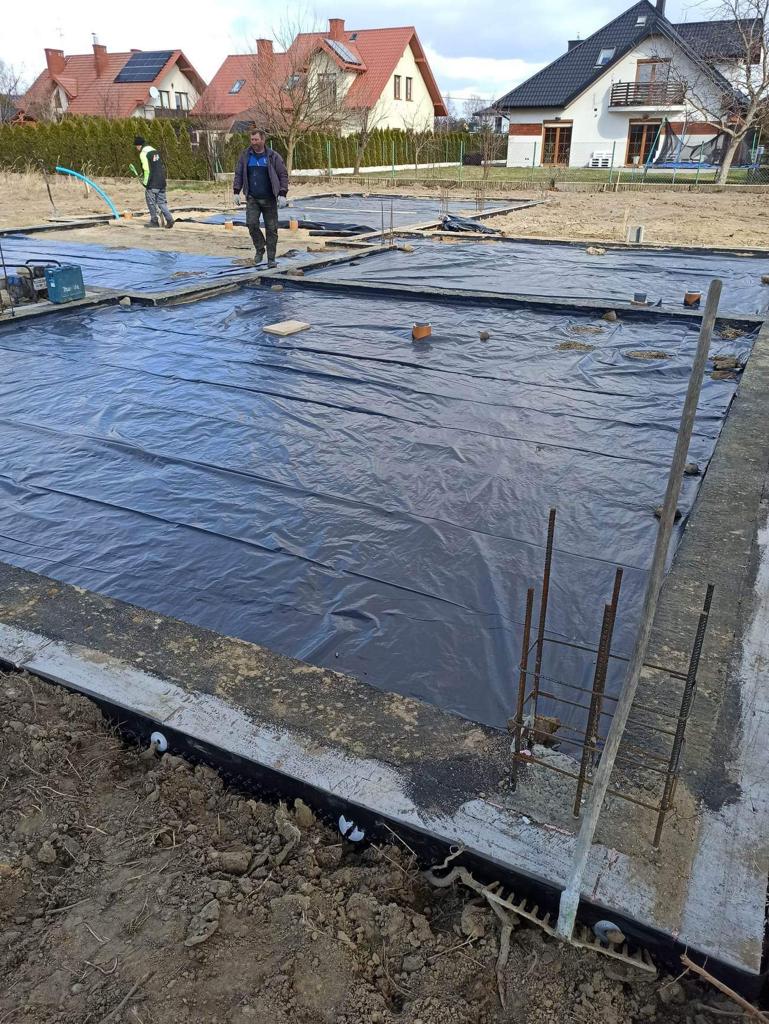
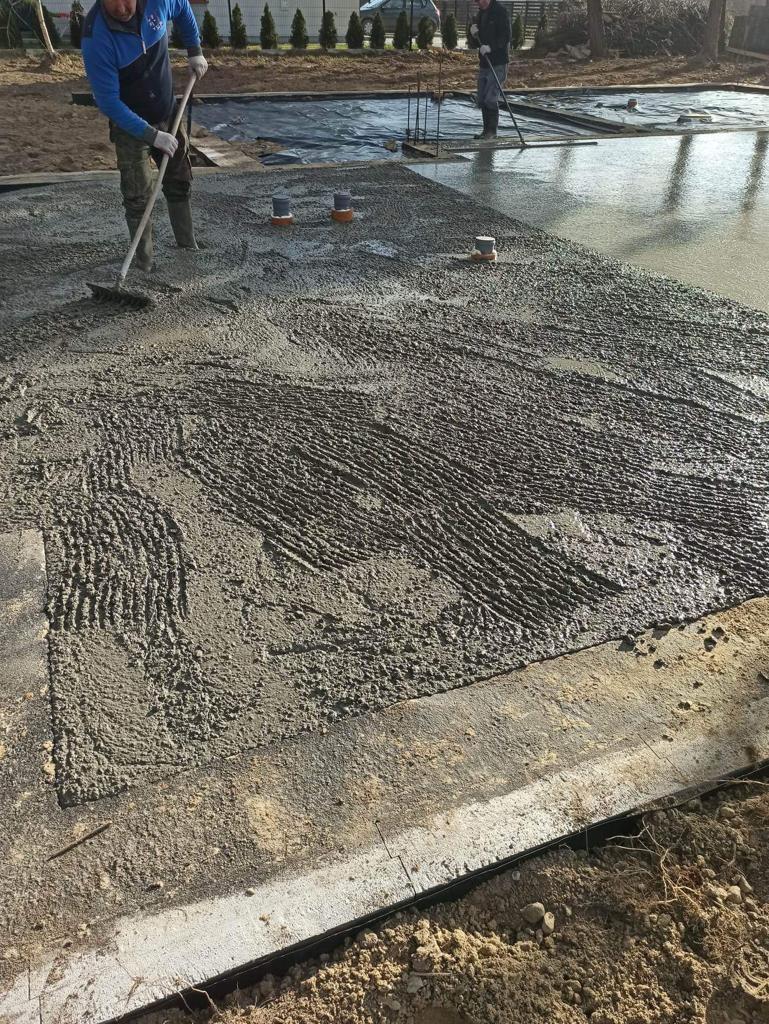
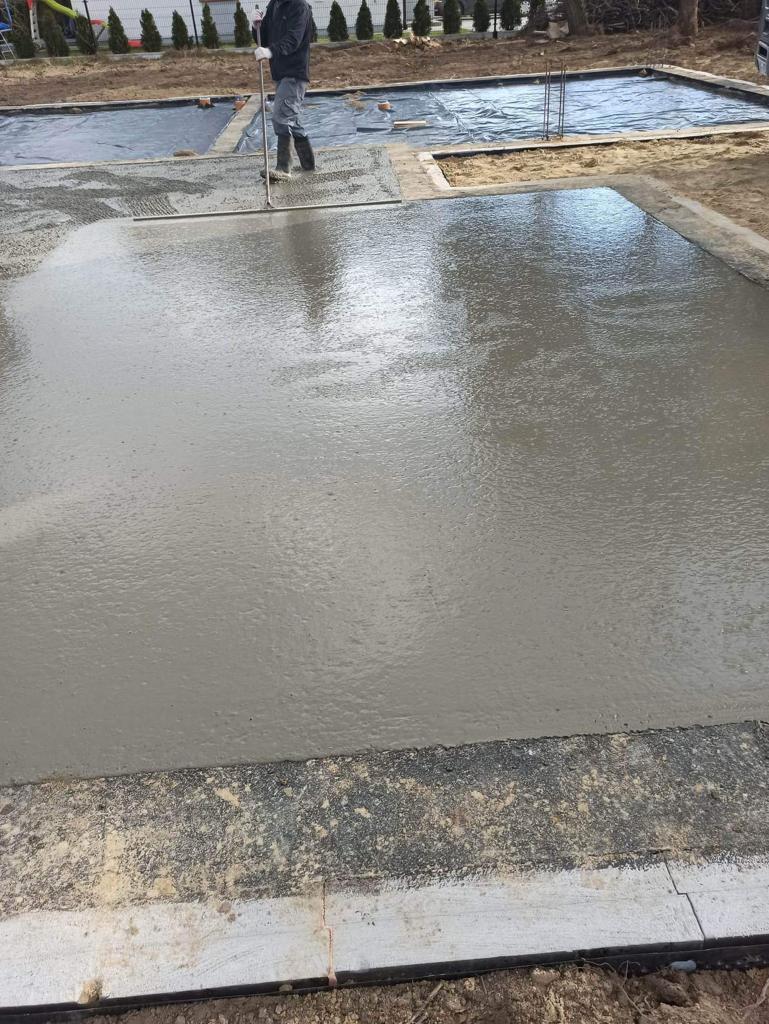
Creating a ground-level floor in a building involves directly laying floor layers on a compacted soil base. This is a popular solution in single-family houses and single-story buildings. The process consists of layering the following components in sequence:
- Soil Compaction – The base must be properly leveled and compacted to prevent settling.
- Damp-Proof Membrane Layer – A membrane or foil protects against moisture from the ground.
- Thermal Insulation Layer – Typically made of polystyrene boards or mineral wool, providing thermal insulation.
- Concrete Screed – Serves as the main load-bearing layer of the floor.
- Finish Layer – Such as panels, tiles, or parquet
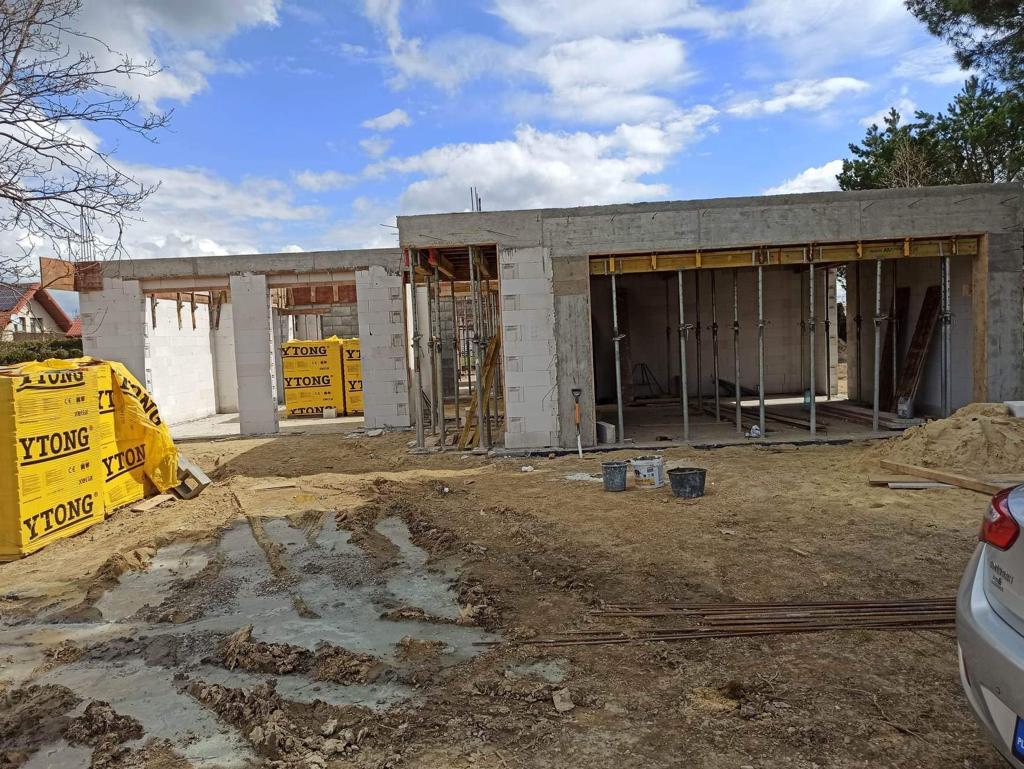
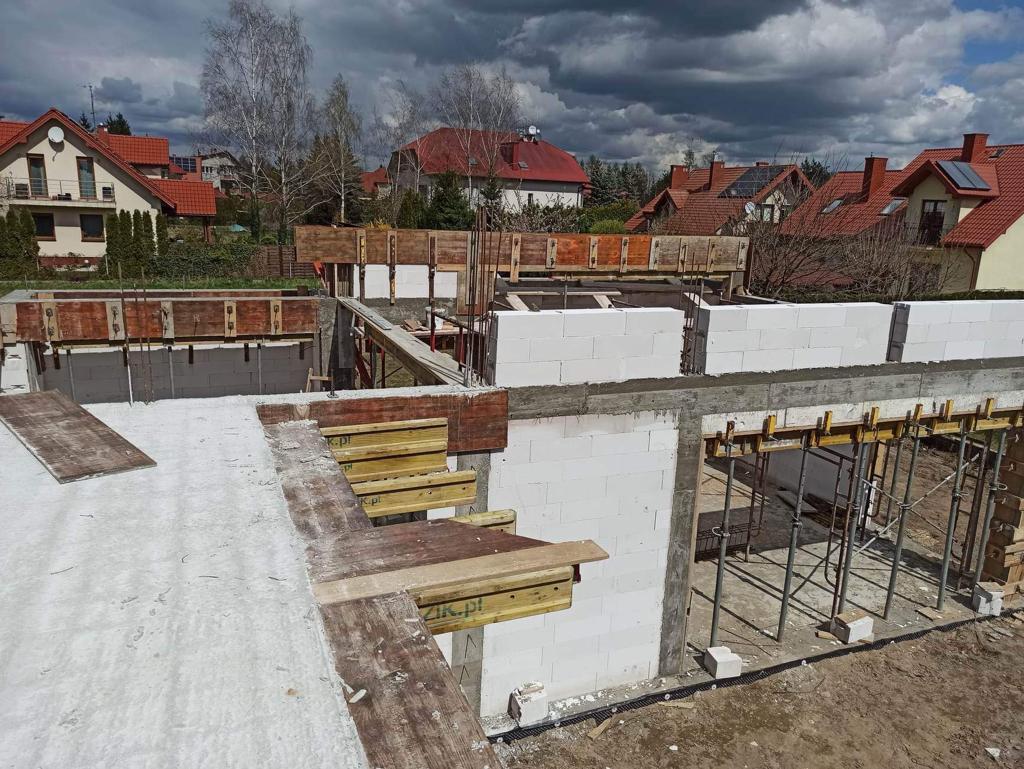
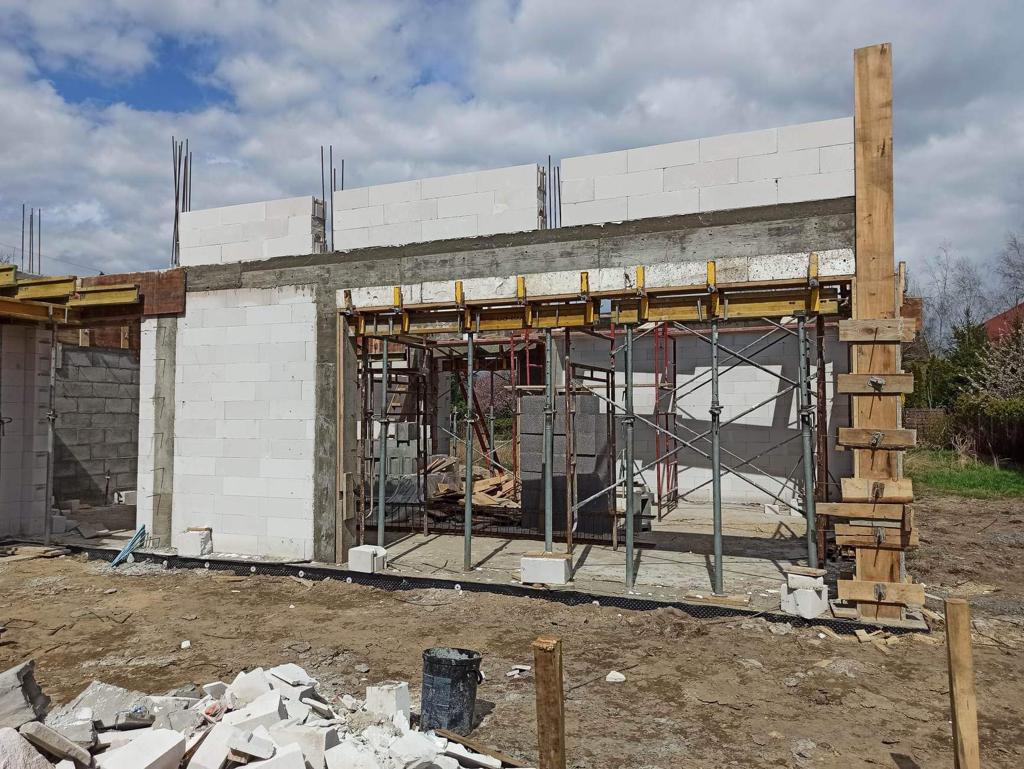
Building Ground Floor Walls
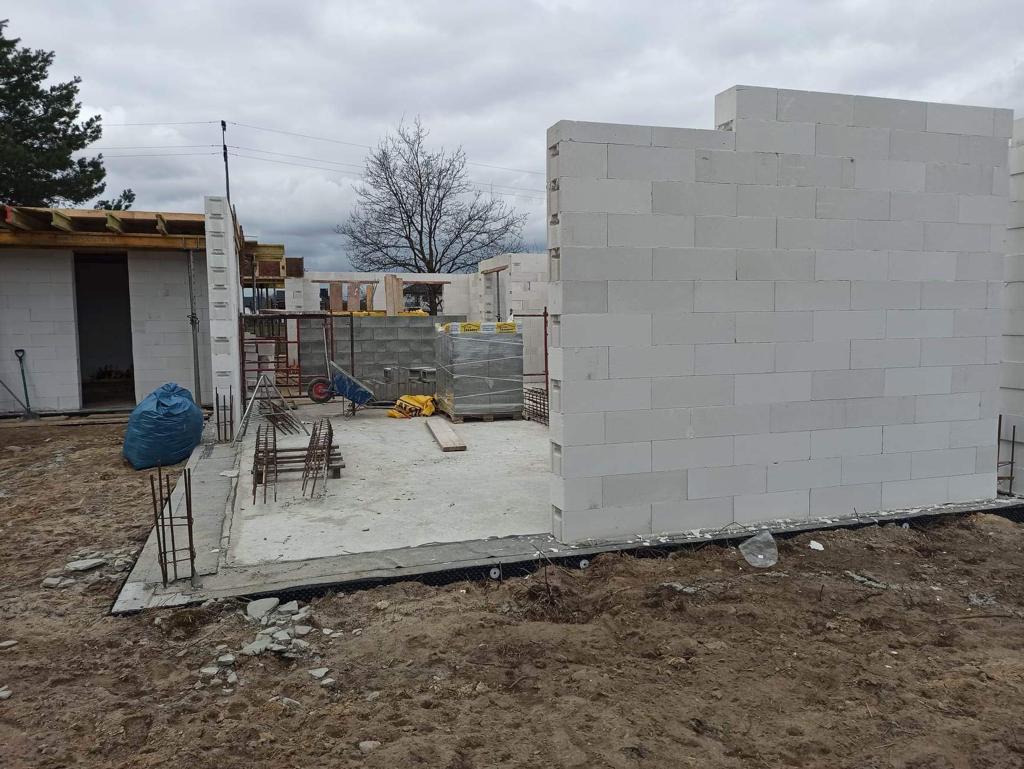

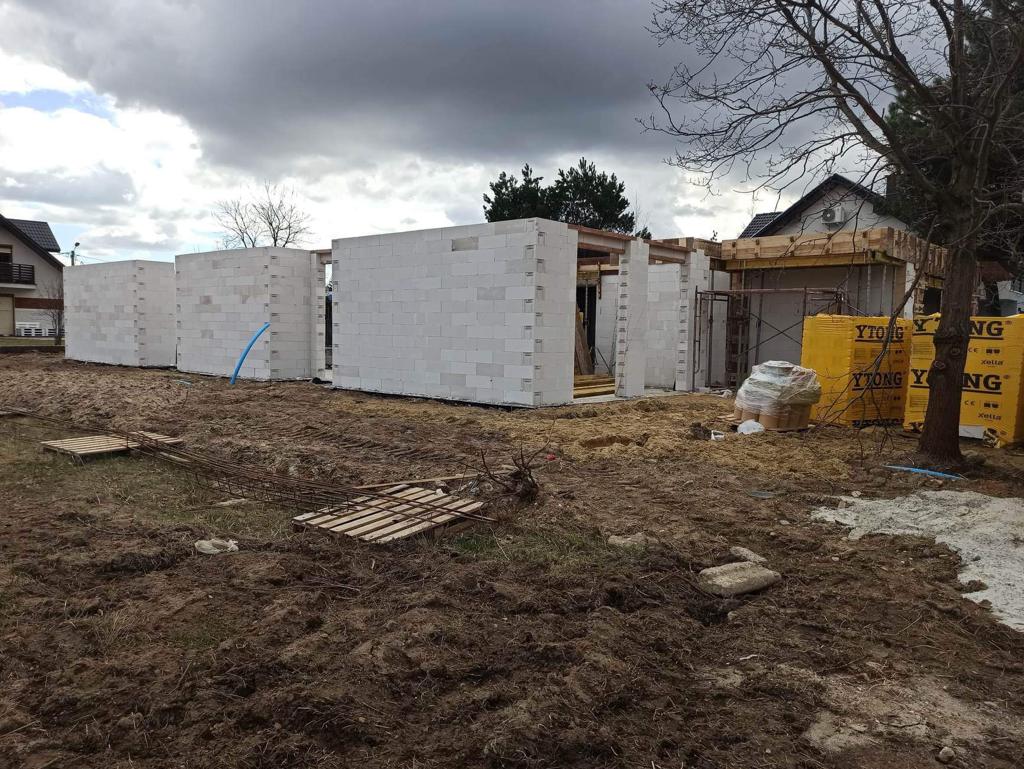
In our projects, exterior walls are typically constructed from concrete blocks. Walls in the building serve a load-bearing function, transferring loads from upper floors and the roof to the foundations, while also providing thermal and acoustic insulation. Proper wall construction directly impacts the durability and safety of the entire building structure.
Key aspects of wall construction include:
- Leveling the First Layer Correctly – Crucial for the stability and vertical alignment of the wall.
- Using Appropriate Mortar – The type of mortar must match the masonry material to ensure a strong bond.
- Expansion Joints – Including expansion joints to prevent wall cracking due to building settlement or temperature changes.
- Horizontal Insulation – Protection against moisture at the junction between foundations and walls.
- Vertical and Horizontal Alignment – Regular checks with a level to ensure walls are perfectly straight.
Ring beams – reinforced concrete beams
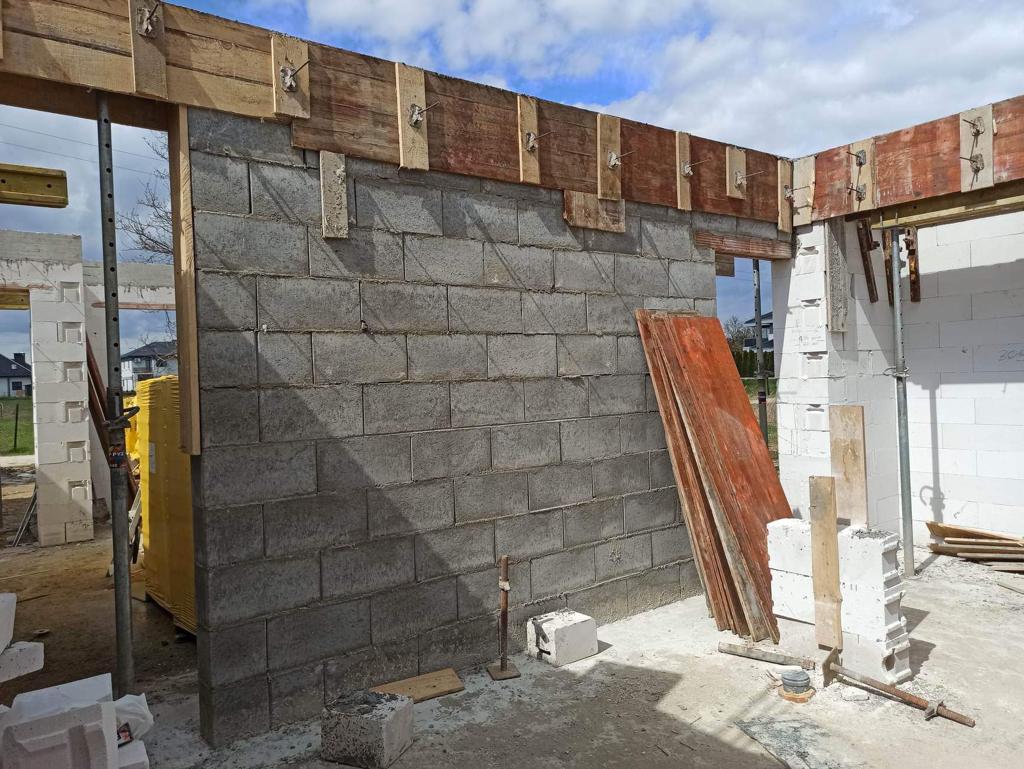
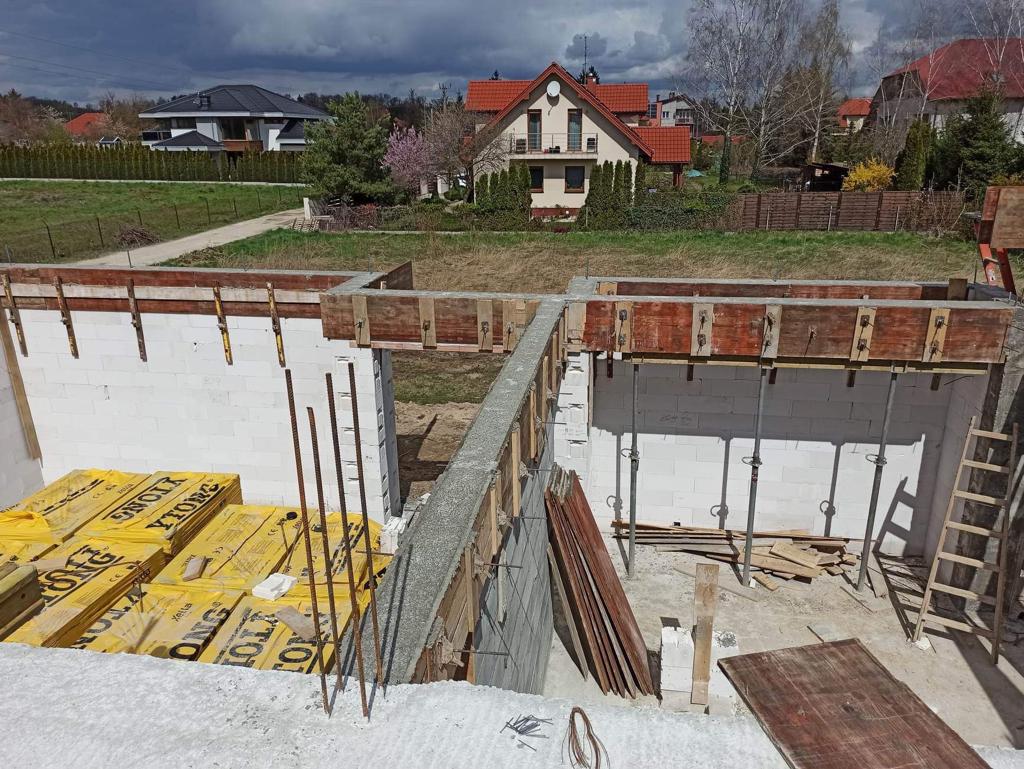
Creating ring beams in a building involves pouring reinforced concrete beams on top of load-bearing walls. The ring beam serves as a horizontal reinforcement for the structure, tying the building together and evenly distributing loads, such as those from the roof or ceiling. It also prevents cracking and deformation of the walls due to lateral forces, such as wind or ground movement. The creation of ring beams is a crucial stage in construction that affects the stability and durability of the entire building, thus requiring high precision and adherence to construction standards.
Key aspects to pay attention to when creating ring beams include:
- Proper Reinforcement – Reinforcing bars must be appropriately arranged and connected to strengthen the structure.
- Care in Formwork – The formwork must be sturdy and straight to ensure the ring beam has the correct shape.
- Good Bonding with Walls – Ring beams must be adequately connected to the walls to ensure the rigidity of the structure.
- Appropriate Concrete Mix – Using high-quality concrete ensures the durability of the ring beam.
Ceiling
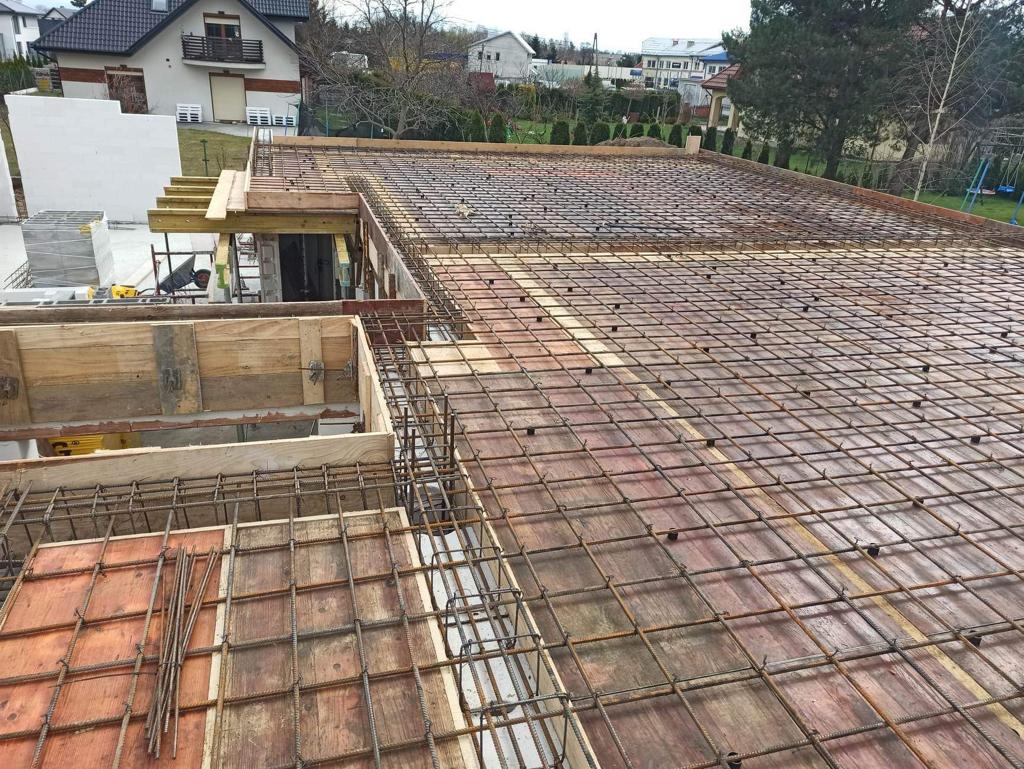
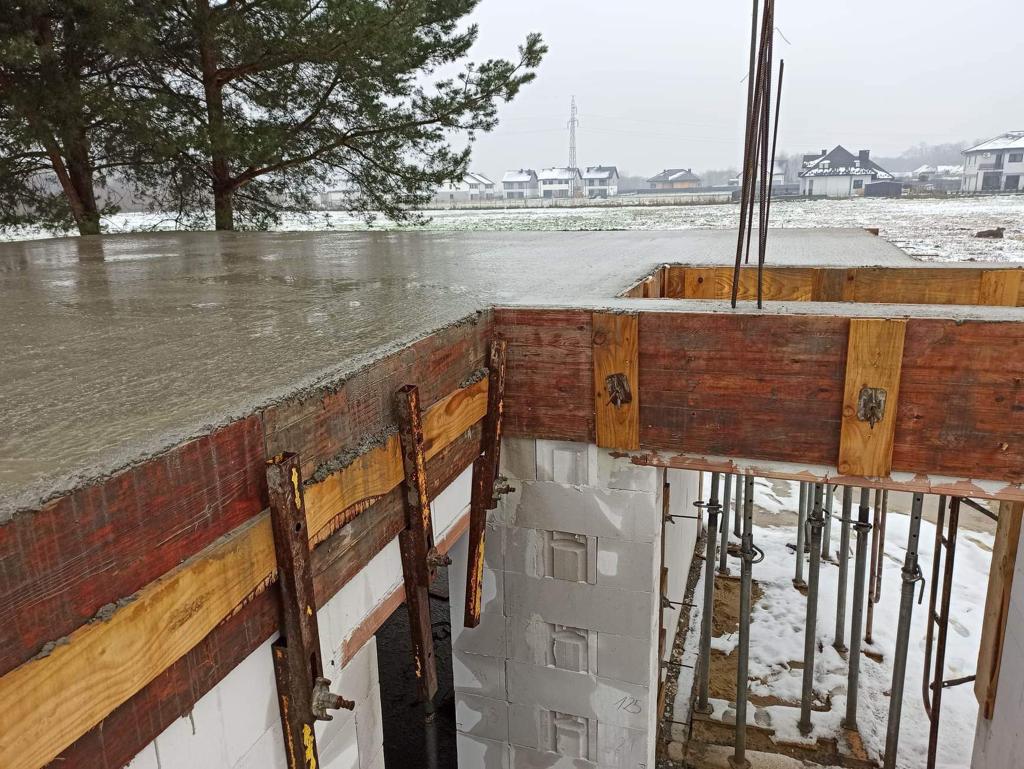
“In the Barn House M one-story, the ceiling structure consists of a monolithic reinforced concrete slab. This means that the ceiling is entirely constructed on-site (unlike, for example, Teriva ceilings, which are assembled using prefabricated elements). The process of pouring monolithic reinforced concrete ceilings involves creating a homogeneous (monolithic) ceiling structure made of steel-reinforced concrete. This process consists of several key stages:
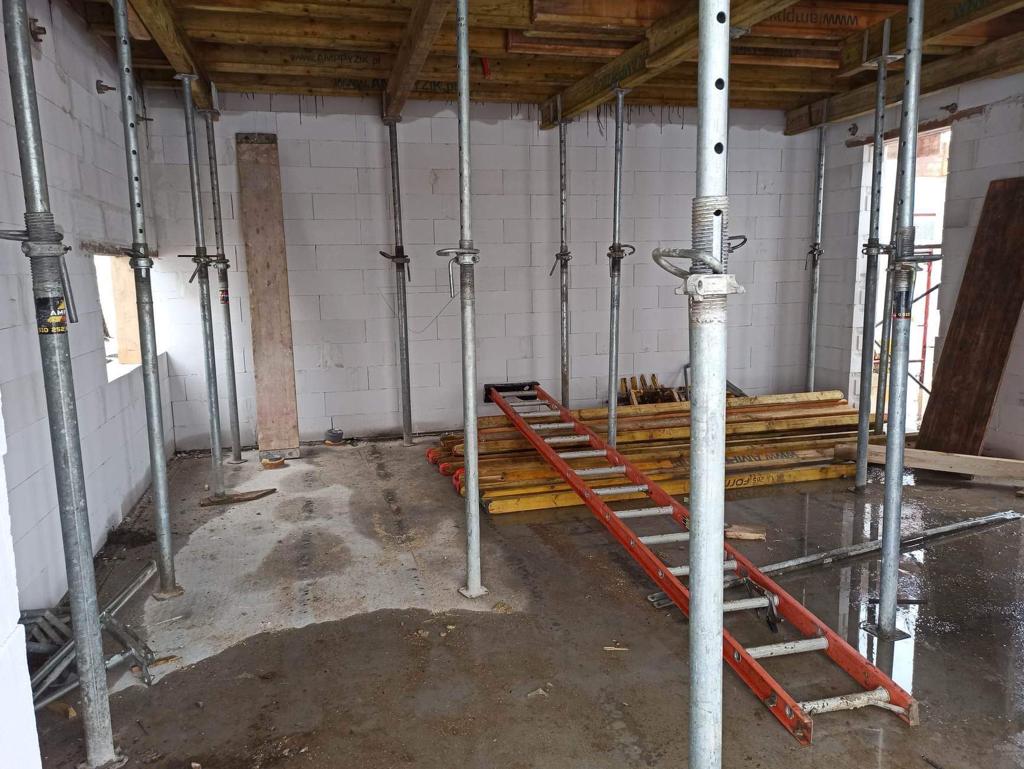
- Formwork Preparation – Formwork, which consists of temporary structures made of boards, sheets, or specialized formwork systems that shape the ceiling, must be installed. The formwork must be carefully leveled and securely supported to hold the weight of the concrete until it hardens.
- Reinforcement Installation – Reinforcing bars are placed in the formwork according to the construction design. The reinforcement aims to strengthen the ceiling and increase its load-bearing capacity. Steel bars are tied together in a suitable grid, and additional reinforcements are used in areas with greater loads (e.g., around stair openings).
- Installation Preparation – Before pouring the concrete, all necessary utility conduits (electrical, ventilation) that will pass through the ceiling must be installed.
- Concrete Pouring – After the formwork and reinforcement are installed, concrete is poured, starting from the farthest points and moving towards the exit. The concrete should be mixed and poured evenly.
- Concrete Vibrating – After pouring, the concrete is vibrated using special devices that remove air and evenly distribute the mixture. This increases the density of the concrete and eliminates the risk of voids.
- Concrete Curing – The ceiling requires adequate moistening for several days after pouring to prevent rapid drying and cracking. The typical drying time for concrete is about 28 days, although the initial hardening phase is shorter.
- Formwork Removal – After achieving sufficient concrete strength (usually after several days), the formwork and supports can be safely removed.
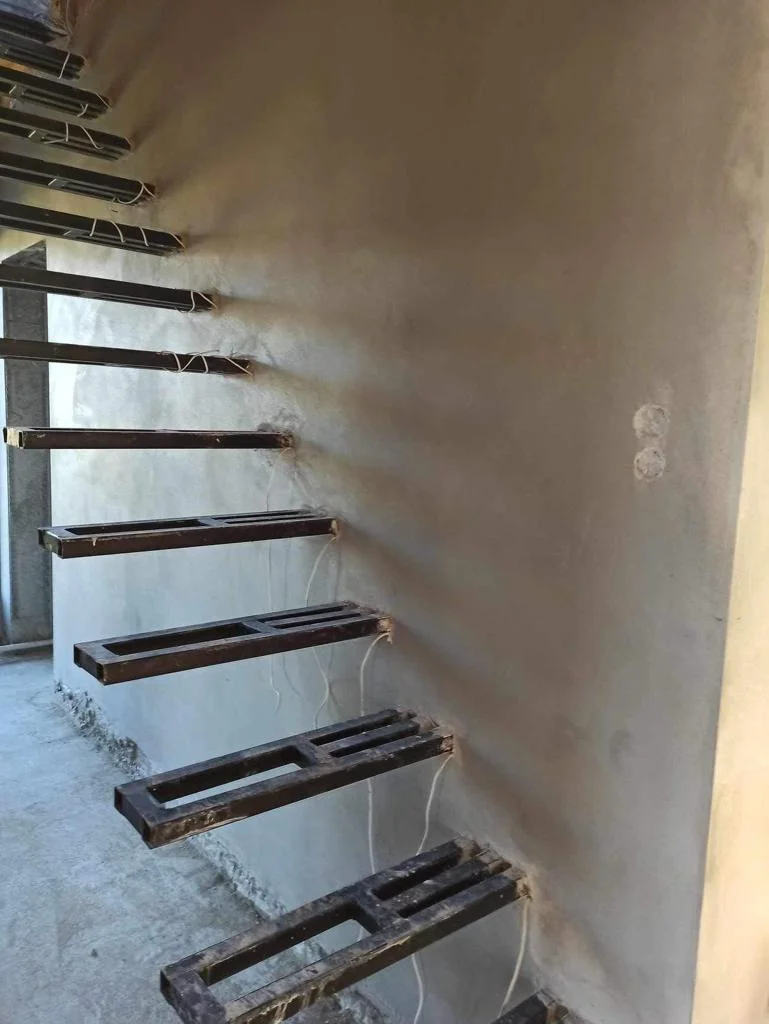
Building Knee Walls
Knee walls are low walls located between the ceiling of the top floor and the sloping roof. They are placed at the edge of the ceiling and increase the height of the attic, thereby enhancing the usable space in attic rooms. The height of knee walls can vary depending on the design and the roof slope, but typically ranges from several dozen centimeters to about 1.5 meters. Structurally, they serve an important function by transferring loads from the roof to the load-bearing walls and foundations, which is why they must be constructed solidly and well-integrated with the rest of the building.
Roof Truss

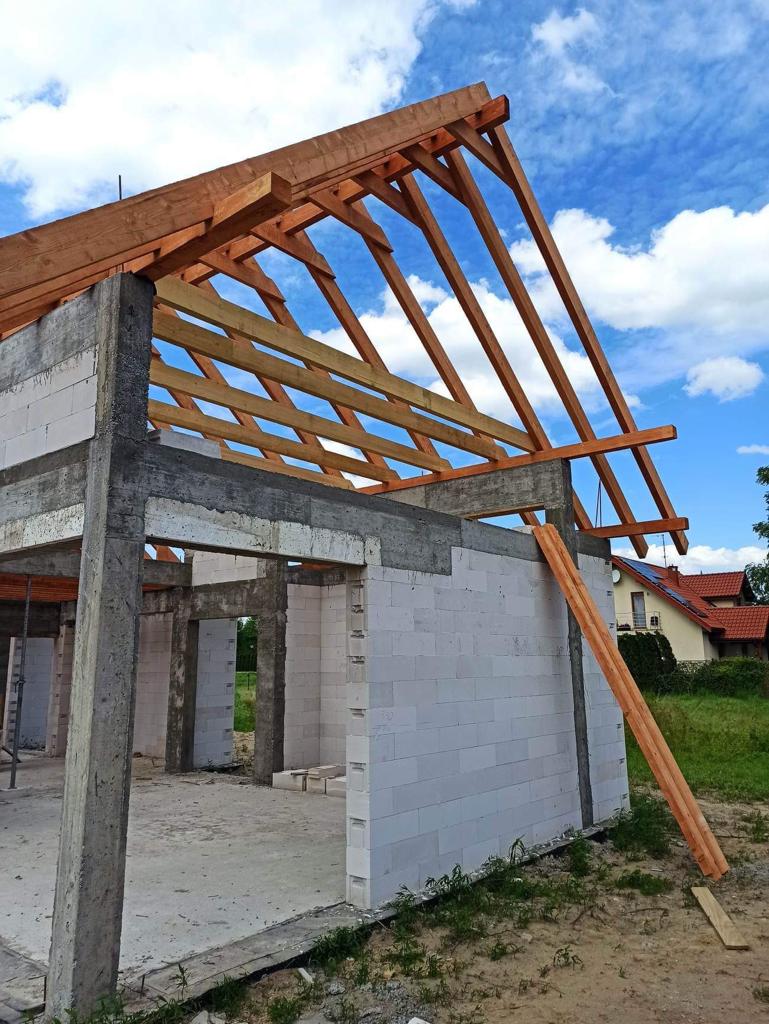
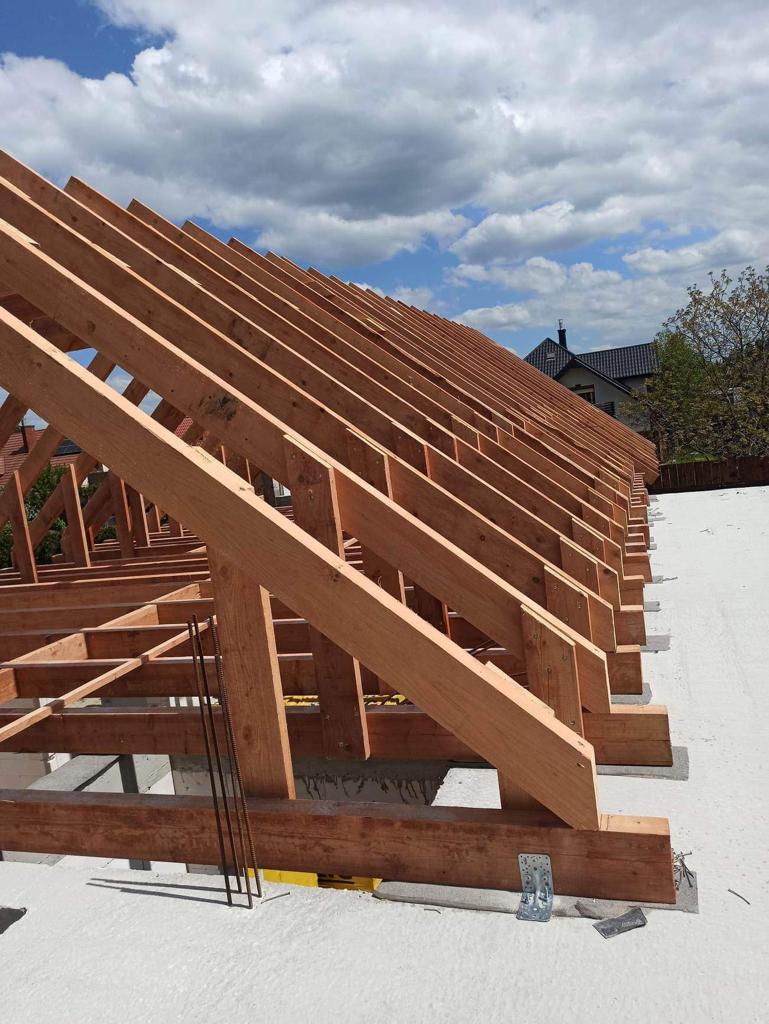
The roof truss is a load-bearing structure of the roof, composed of wooden (or steel) elements that support the roofing material and transfer loads to the building’s walls. Its primary role is to ensure the stability and strength of the roof, as well as to create the appropriate shape that facilitates the drainage of rainwater and snow from the surface.
The roof truss consists of several key components:
- Rafters – These are the main beams that form the framework of the roof, arranged at the proper angle. They transfer loads from the roofing material to the wall plates.
- Wall Plates – Horizontal beams placed on the walls to which the rafters are attached. They serve as the foundation for the entire truss system.
- Purlins – Additional horizontal beams placed in the middle part of the roof, which increase the stiffness of the structure and divide the roof span into smaller sections.
- Bracing – Cross elements that reinforce the truss and prevent the rafters from sagging.
- Ridge – The highest point of the roof where the rafters from both sides meet.
Roof Covering

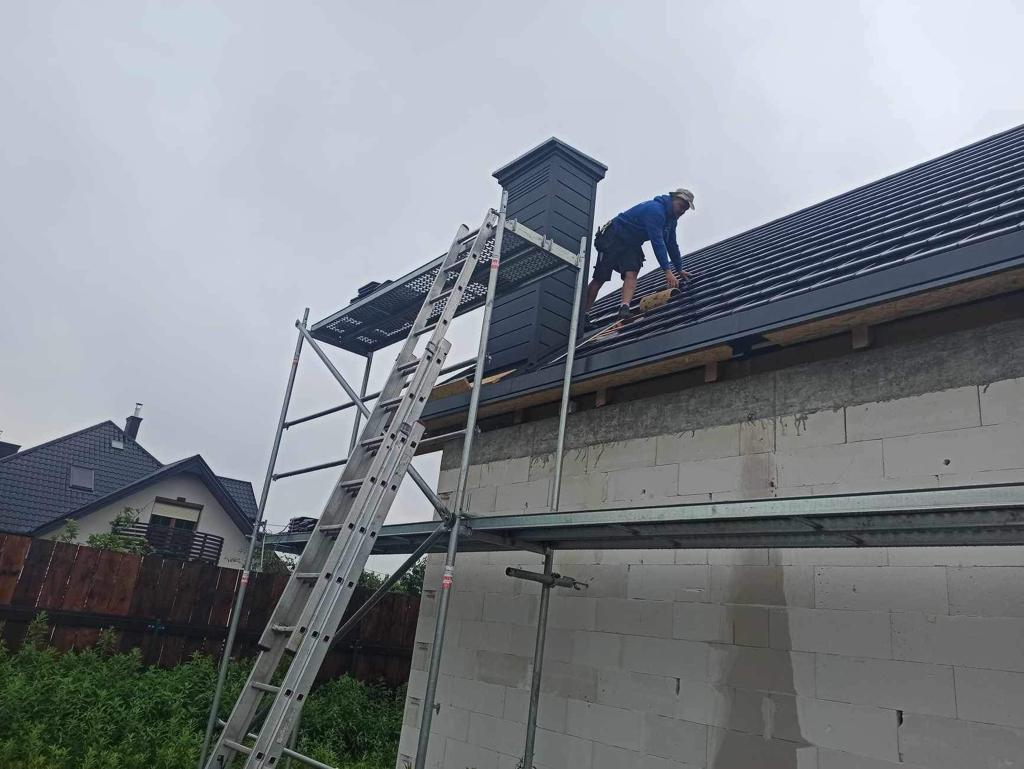
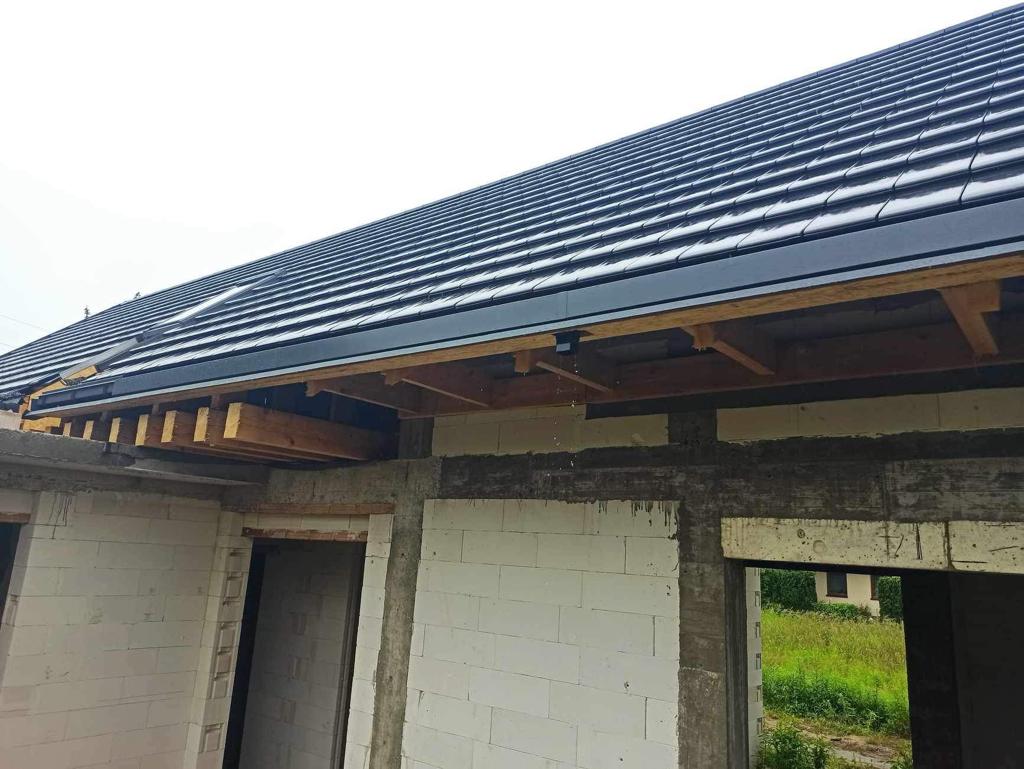
The installation of roof covering in a building involves applying materials that protect the interior from weather conditions such as rain, snow, wind, and sunlight. The process may vary depending on the type of covering, but the general steps are similar.
Here are the steps in the process:
- Installation of Vapor Barrier – A vapor barrier is laid on the rafters or purlins to protect against moisture. The barrier should be installed in the direction of the roof slope.
- Installation of Counter Battens – Counter battens are mounted on the rafters to allow for roof ventilation and create a space for water drainage.
- Installation of Battens – Battens are placed on the counter battens to support the roof covering. They must be spaced according to the requirements of the covering manufacturer.
- Decking – While not always necessary, installing decking boards on the battens can improve stability and reinforce the roof.
- Installation of Roof Covering – Depending on the chosen material (tiles, metal sheets, shingles, etc.), the installation proceeds. For tiles, they are laid in a specific pattern, starting from the bottom edge of the roof and moving upwards. In the case of metal sheets, panels should be installed along the roof slope, overlapping them as needed.
- Installation of Roof Accessories – After the main covering is installed, various accessories such as gutters, downspouts, chimneys, roof vents, and other elements necessary for proper roof functioning are installed.
- Inspection and Securing – After installation is complete, the roof should be thoroughly inspected for any gaps, leaks, or improper installation of materials. All gaps should be sealed, and the entire structure should be properly secured.
Window Joinery
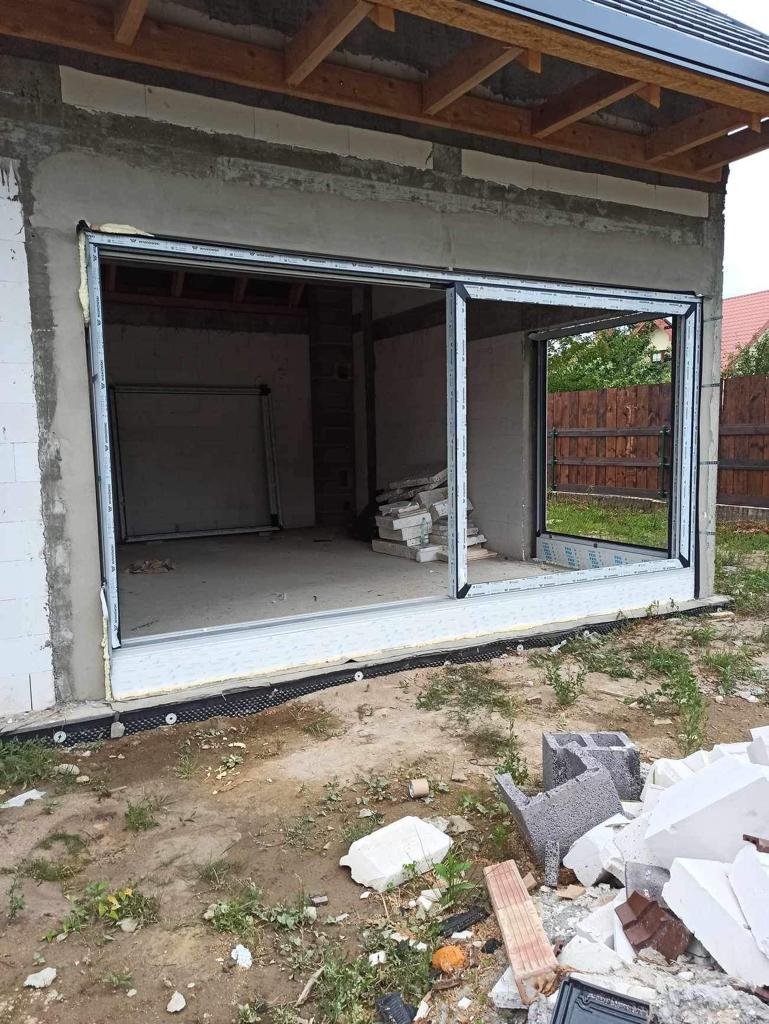
The window is placed in the opening using wedges for leveling. It is important to ensure that the window is set vertically and horizontally. The window frames are attached to the wall using anchors or screws. It is crucial that the fastening is secure while not damaging the window material.
After the window is installed, the gaps between the window and the opening are filled with mounting foam, which provides additional thermal and acoustic insulation. Seals should also be applied to protect against drafts and moisture.
Once the window installation is complete, both external and internal sills are mounted to protect against rainwater and enhance the interior aesthetics.
Interior Works
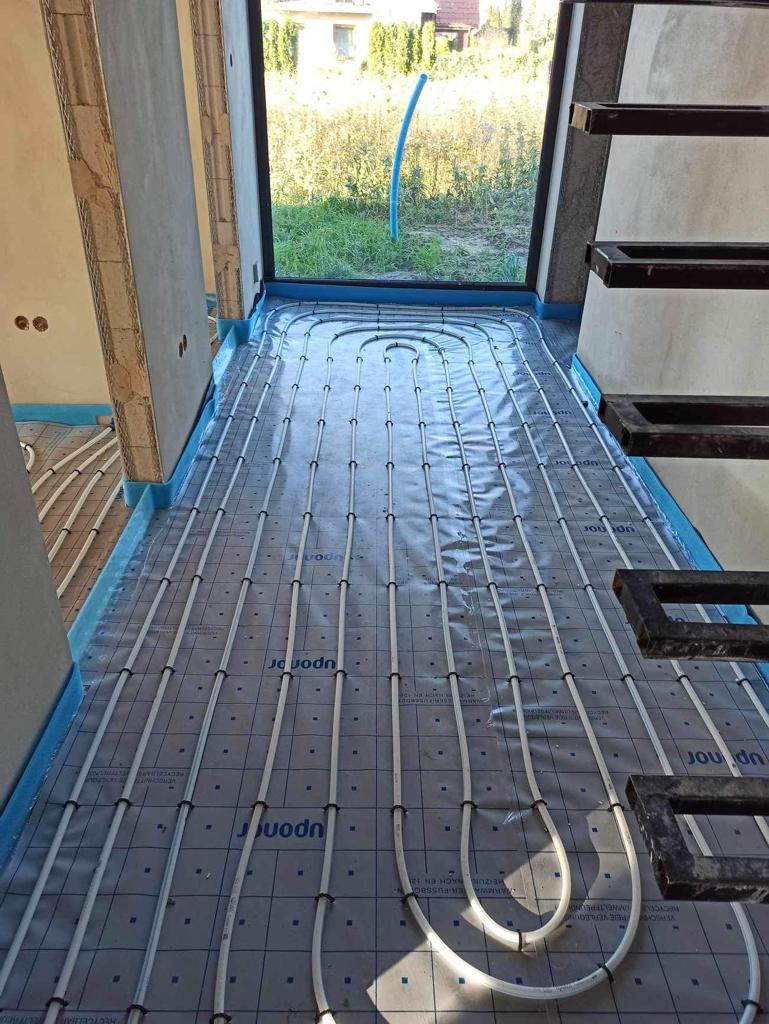
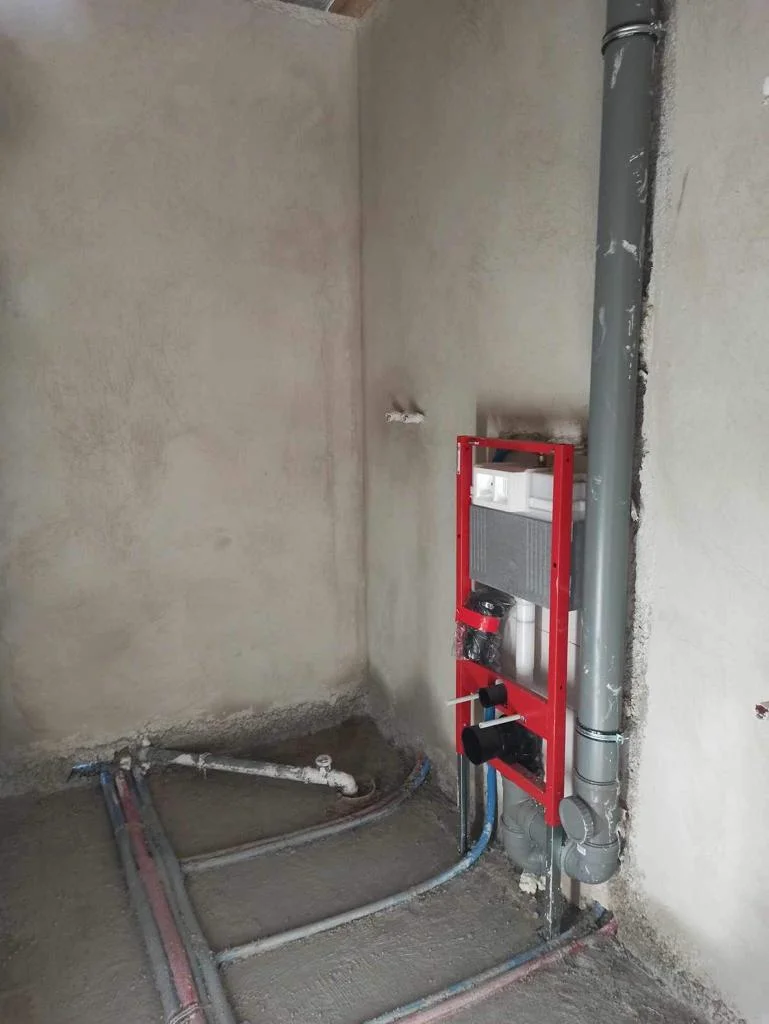
Interior works include, among other things, the installation of heating and the finishing of external stairs. In our projects, underfloor heating is standard. This heating system uses heat emitted by the floor to warm the rooms. It involves placing pipes in the floor in a way that ensures even heat distribution throughout the room. When water flows through the pipes, the floor heats up, and the warmth rises, providing uniform heating.
After the pipes are laid, they are covered with a screed that encapsulates the pipes. The screed can be concrete or anhydrite and should have an appropriate thickness to effectively conduct heat, typically ranging from 3 to 5 cm. Once the screed has dried (usually taking 2 to 4 weeks), the finishing floor is installed (e.g., tiles, panels, carpets), which will directly connect to the substrate.
Finishing the Flat Roof
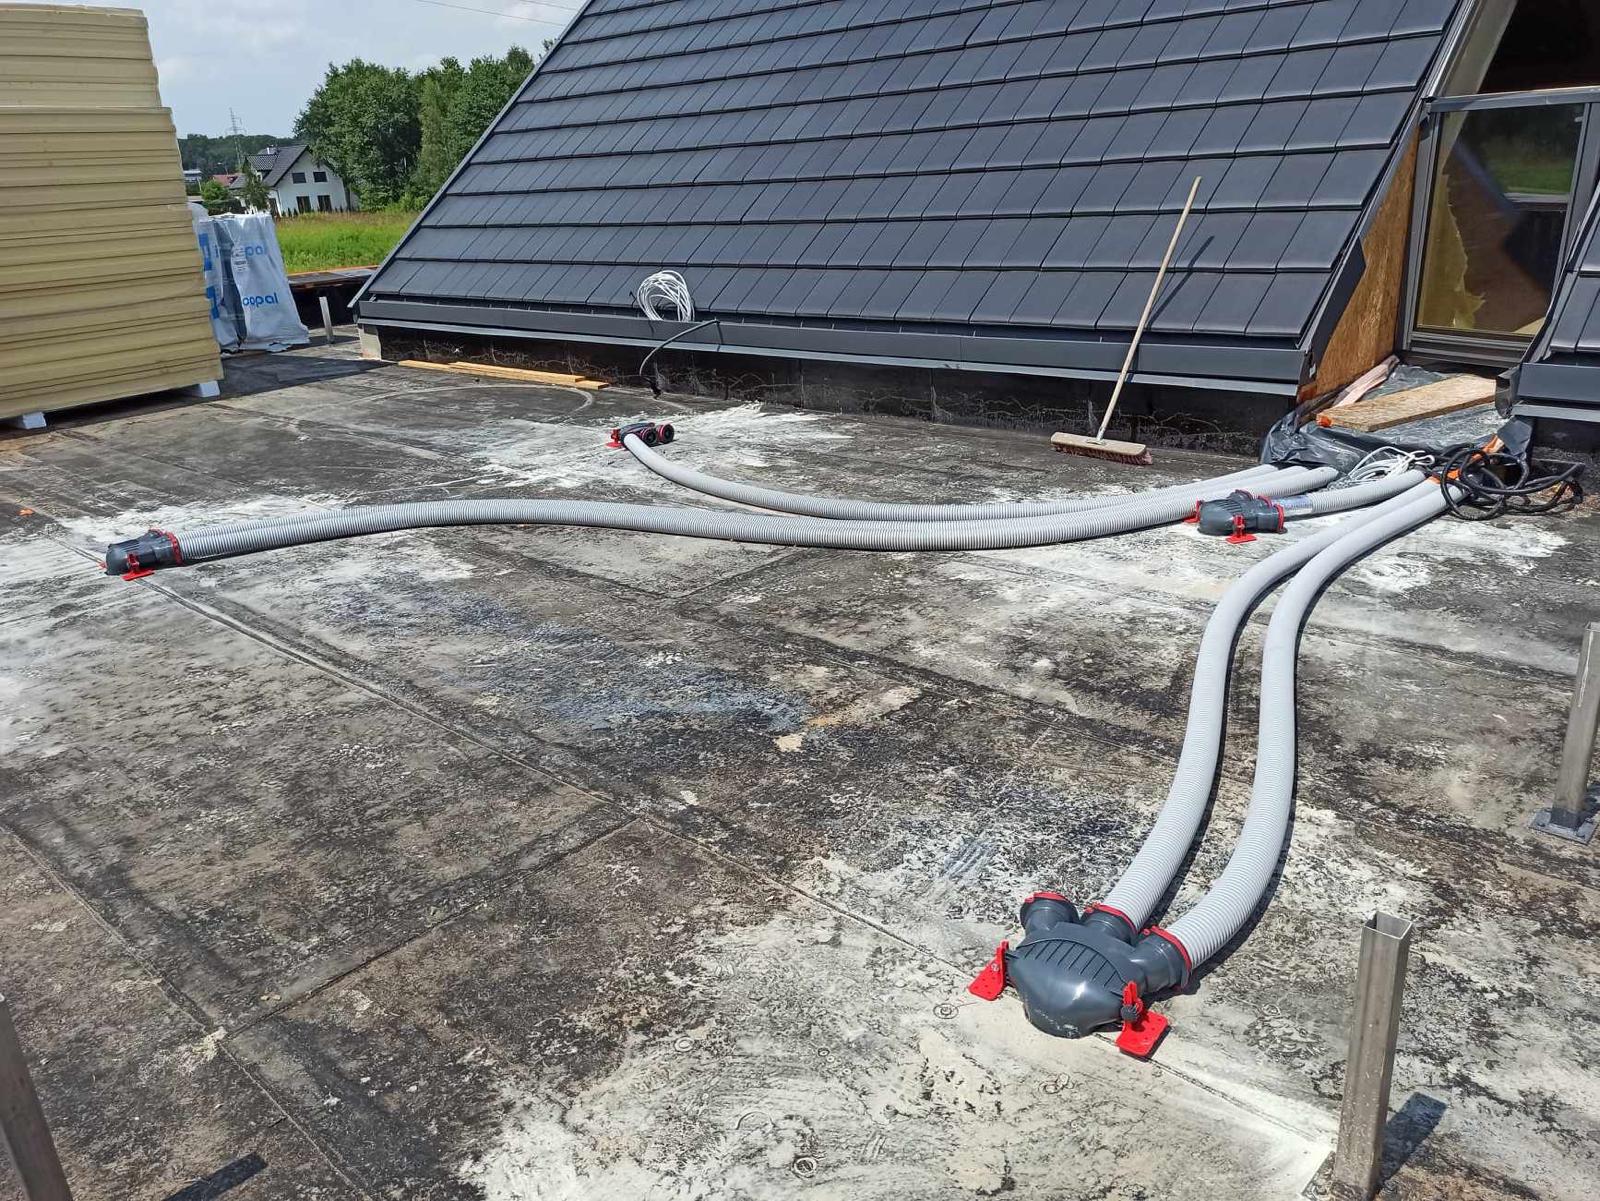
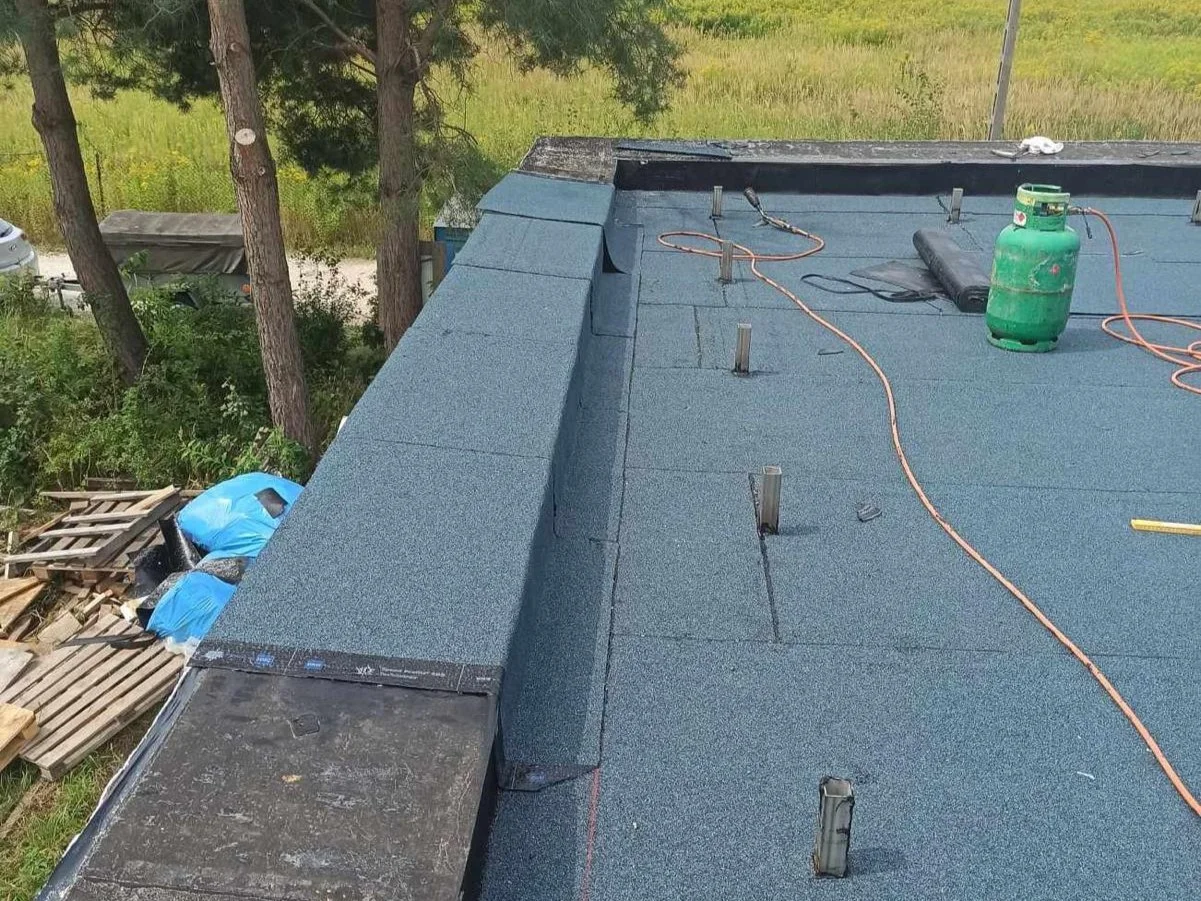
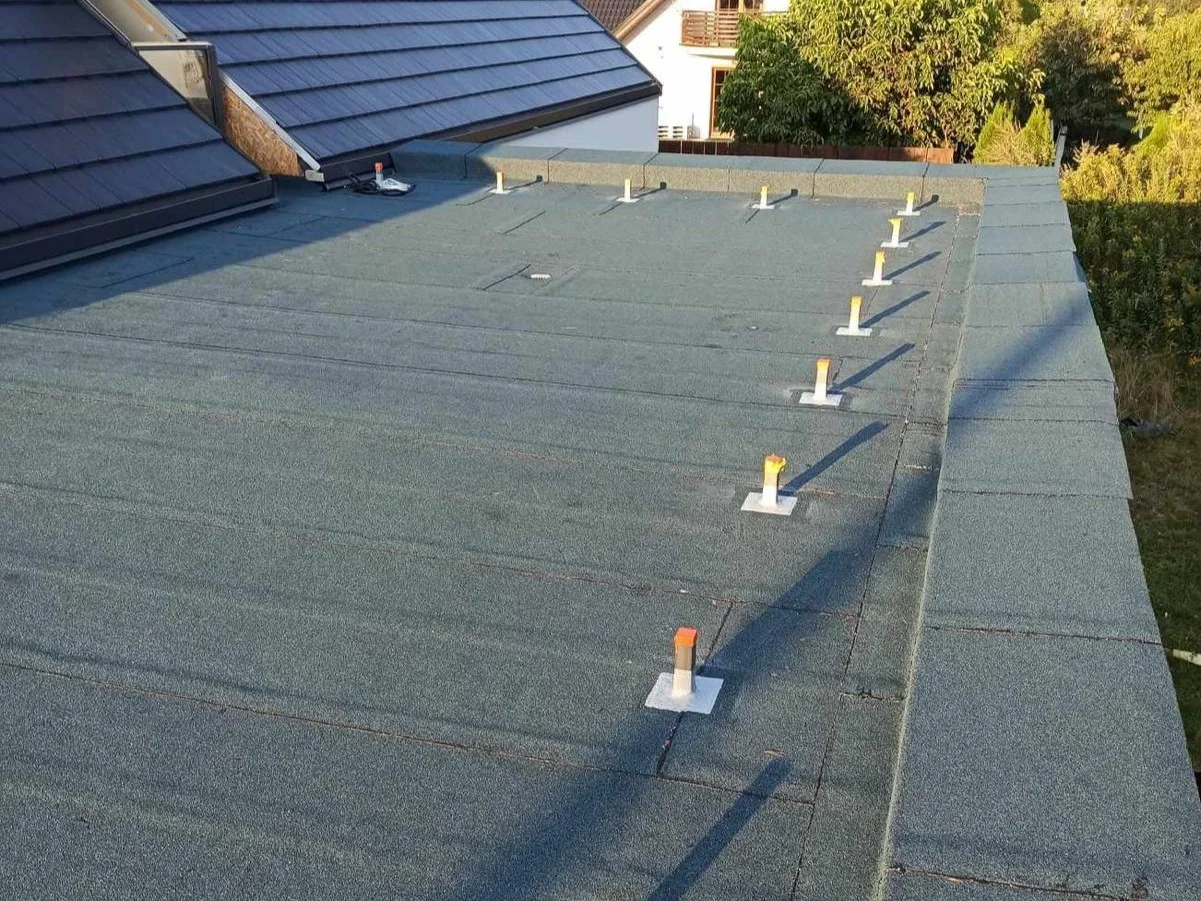
Proper finishing of the flat roof is crucial for ensuring effective waterproofing in the building. Well-executed waterproofing protects the structure from water ingress, preventing damage such as mold, corrosion, and deterioration of building materials.
To achieve maximum effectiveness of waterproofing, it is essential that all layers of the flat roof are carefully installed and thoroughly sealed. Materials such as films, membranes, or specialized coatings are used, which are key to providing long-lasting protection against water.
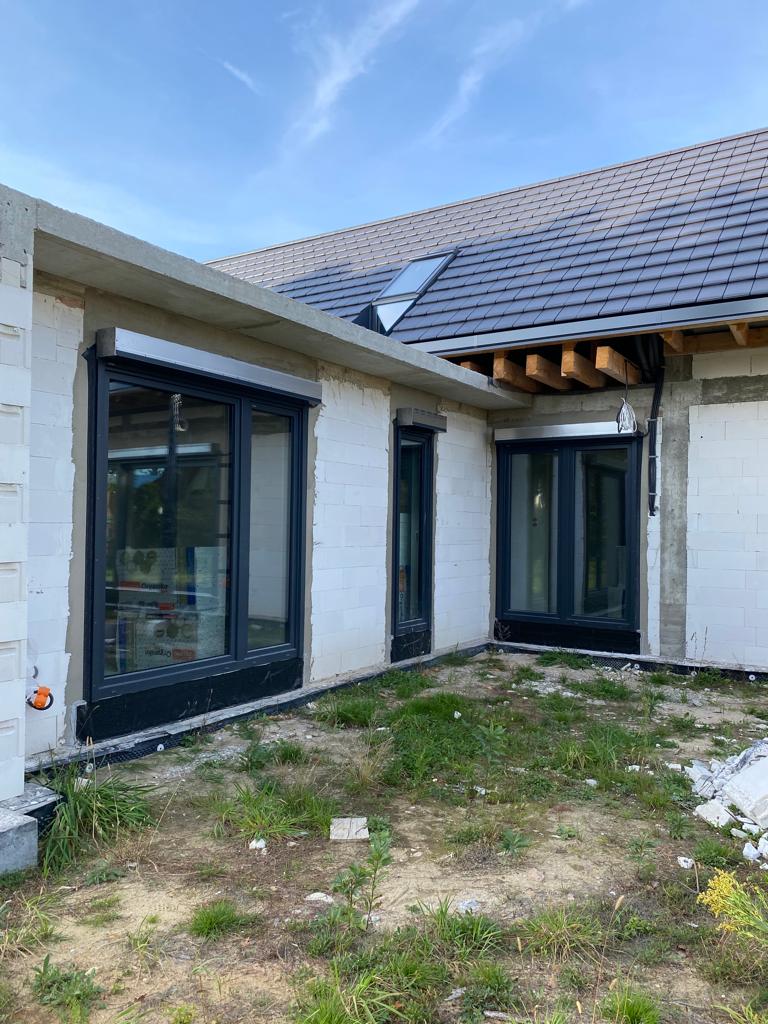
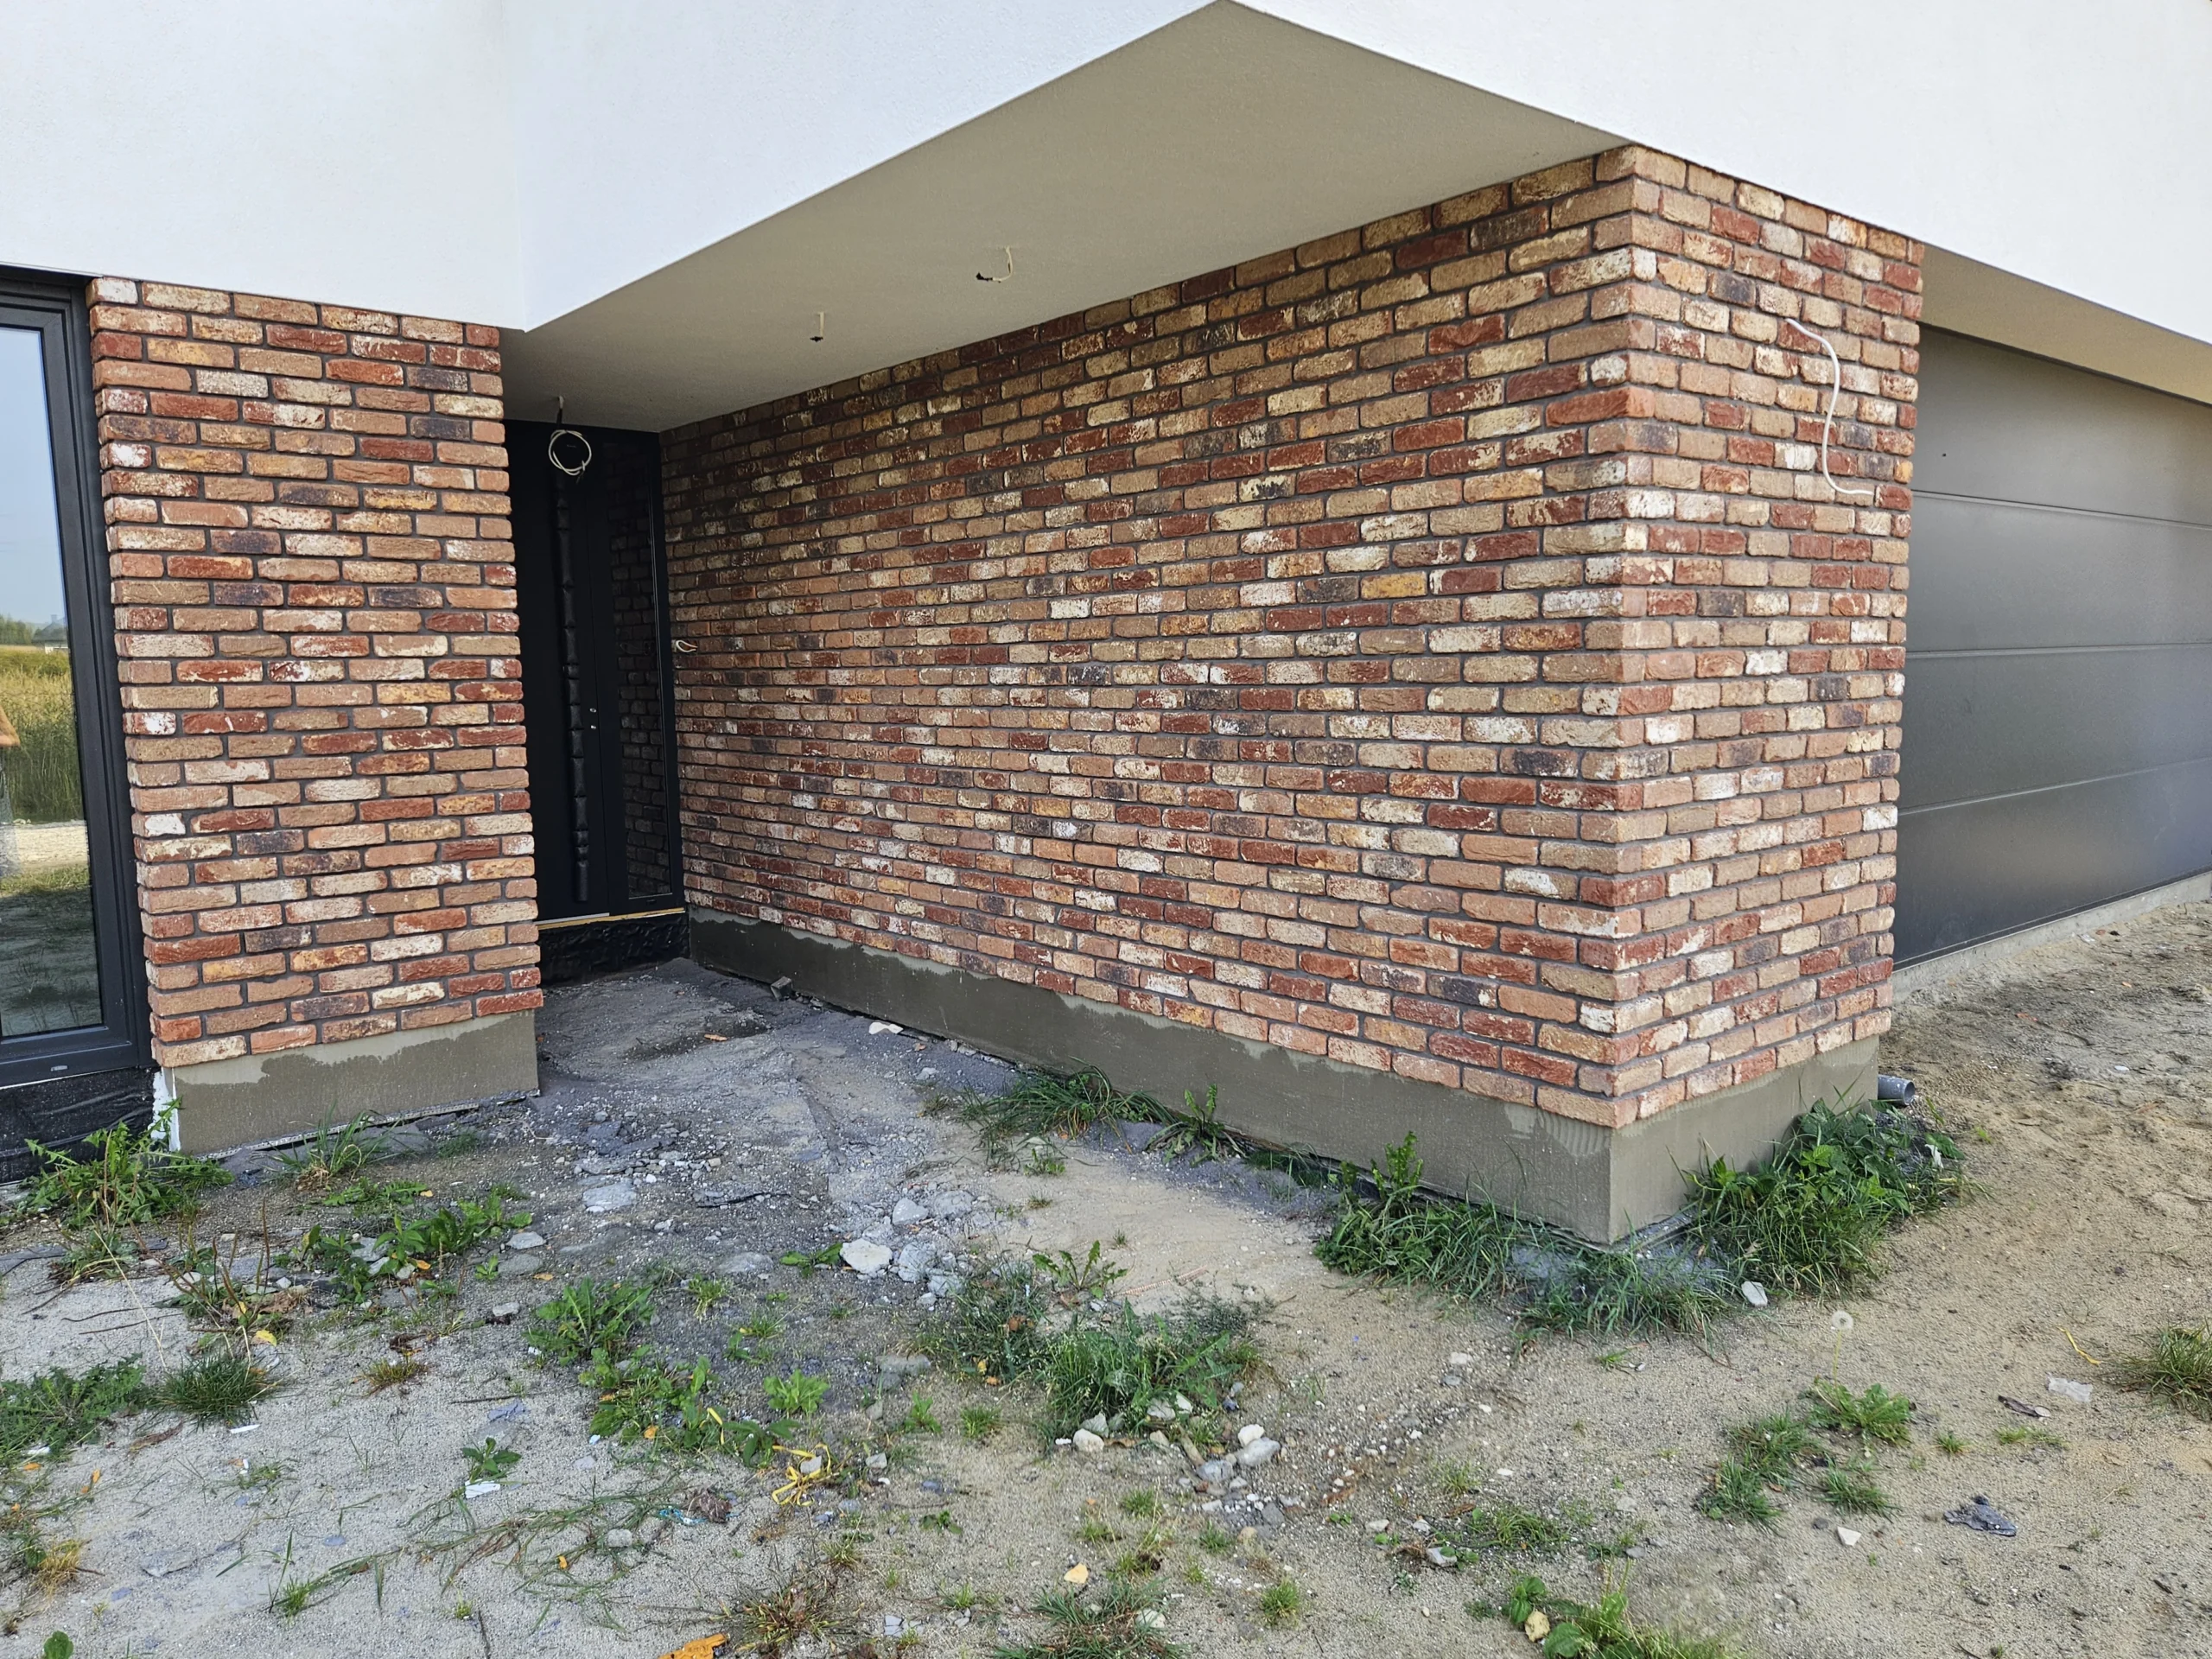
Facade Works
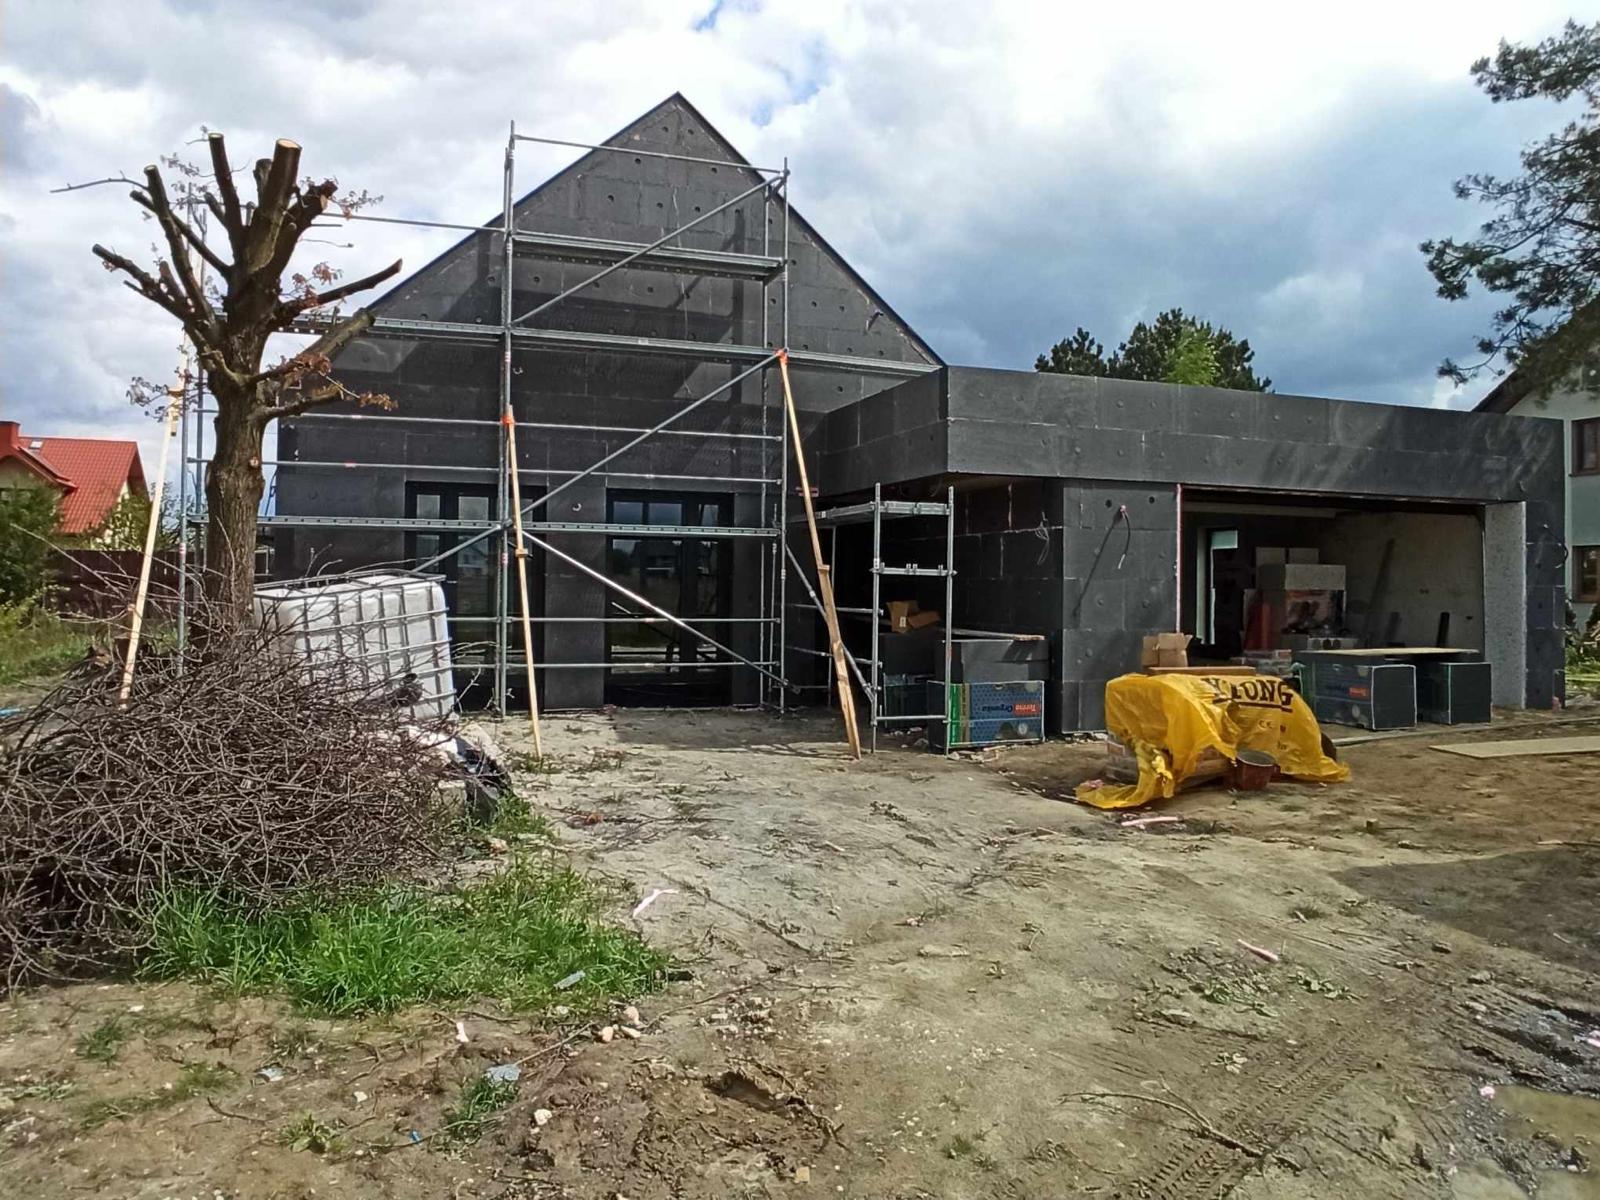
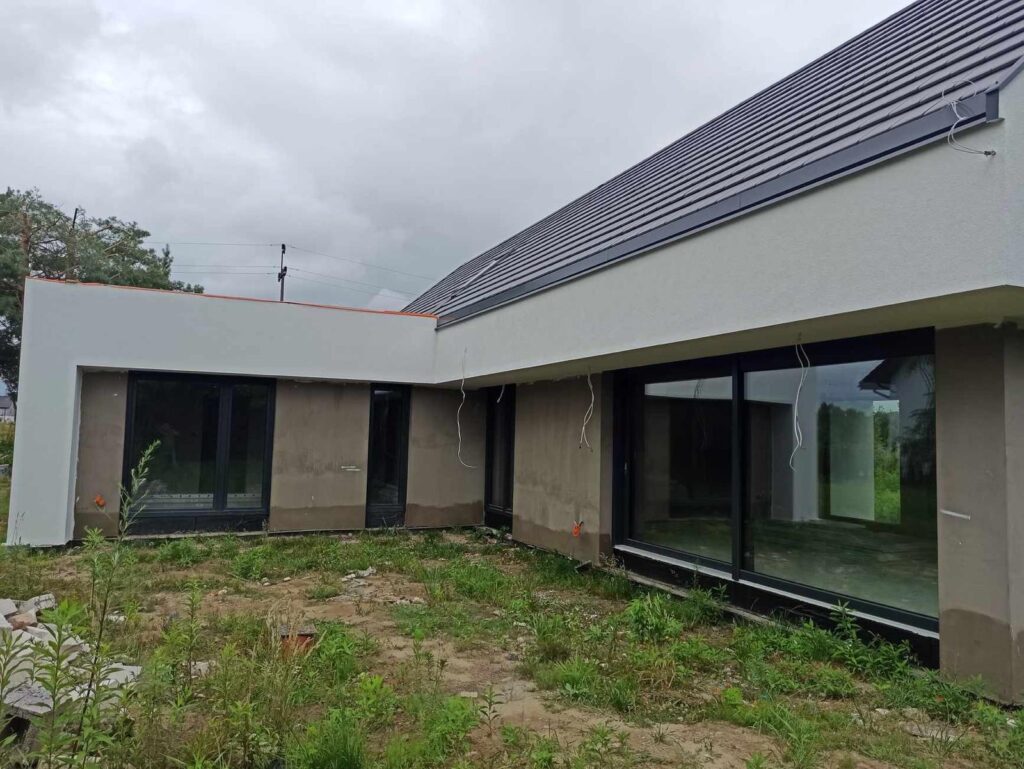
Facade works involve the installation of thermal insulation, followed by the finishing with the chosen facade material. Thermal insulation is typically mounted using dowels, which ensure the stability of the insulation. A reinforcing mesh is often applied over the insulation layer, providing additional reinforcement and adhesion for the plaster. The mesh should be embedded in the plaster correctly to avoid cracking.
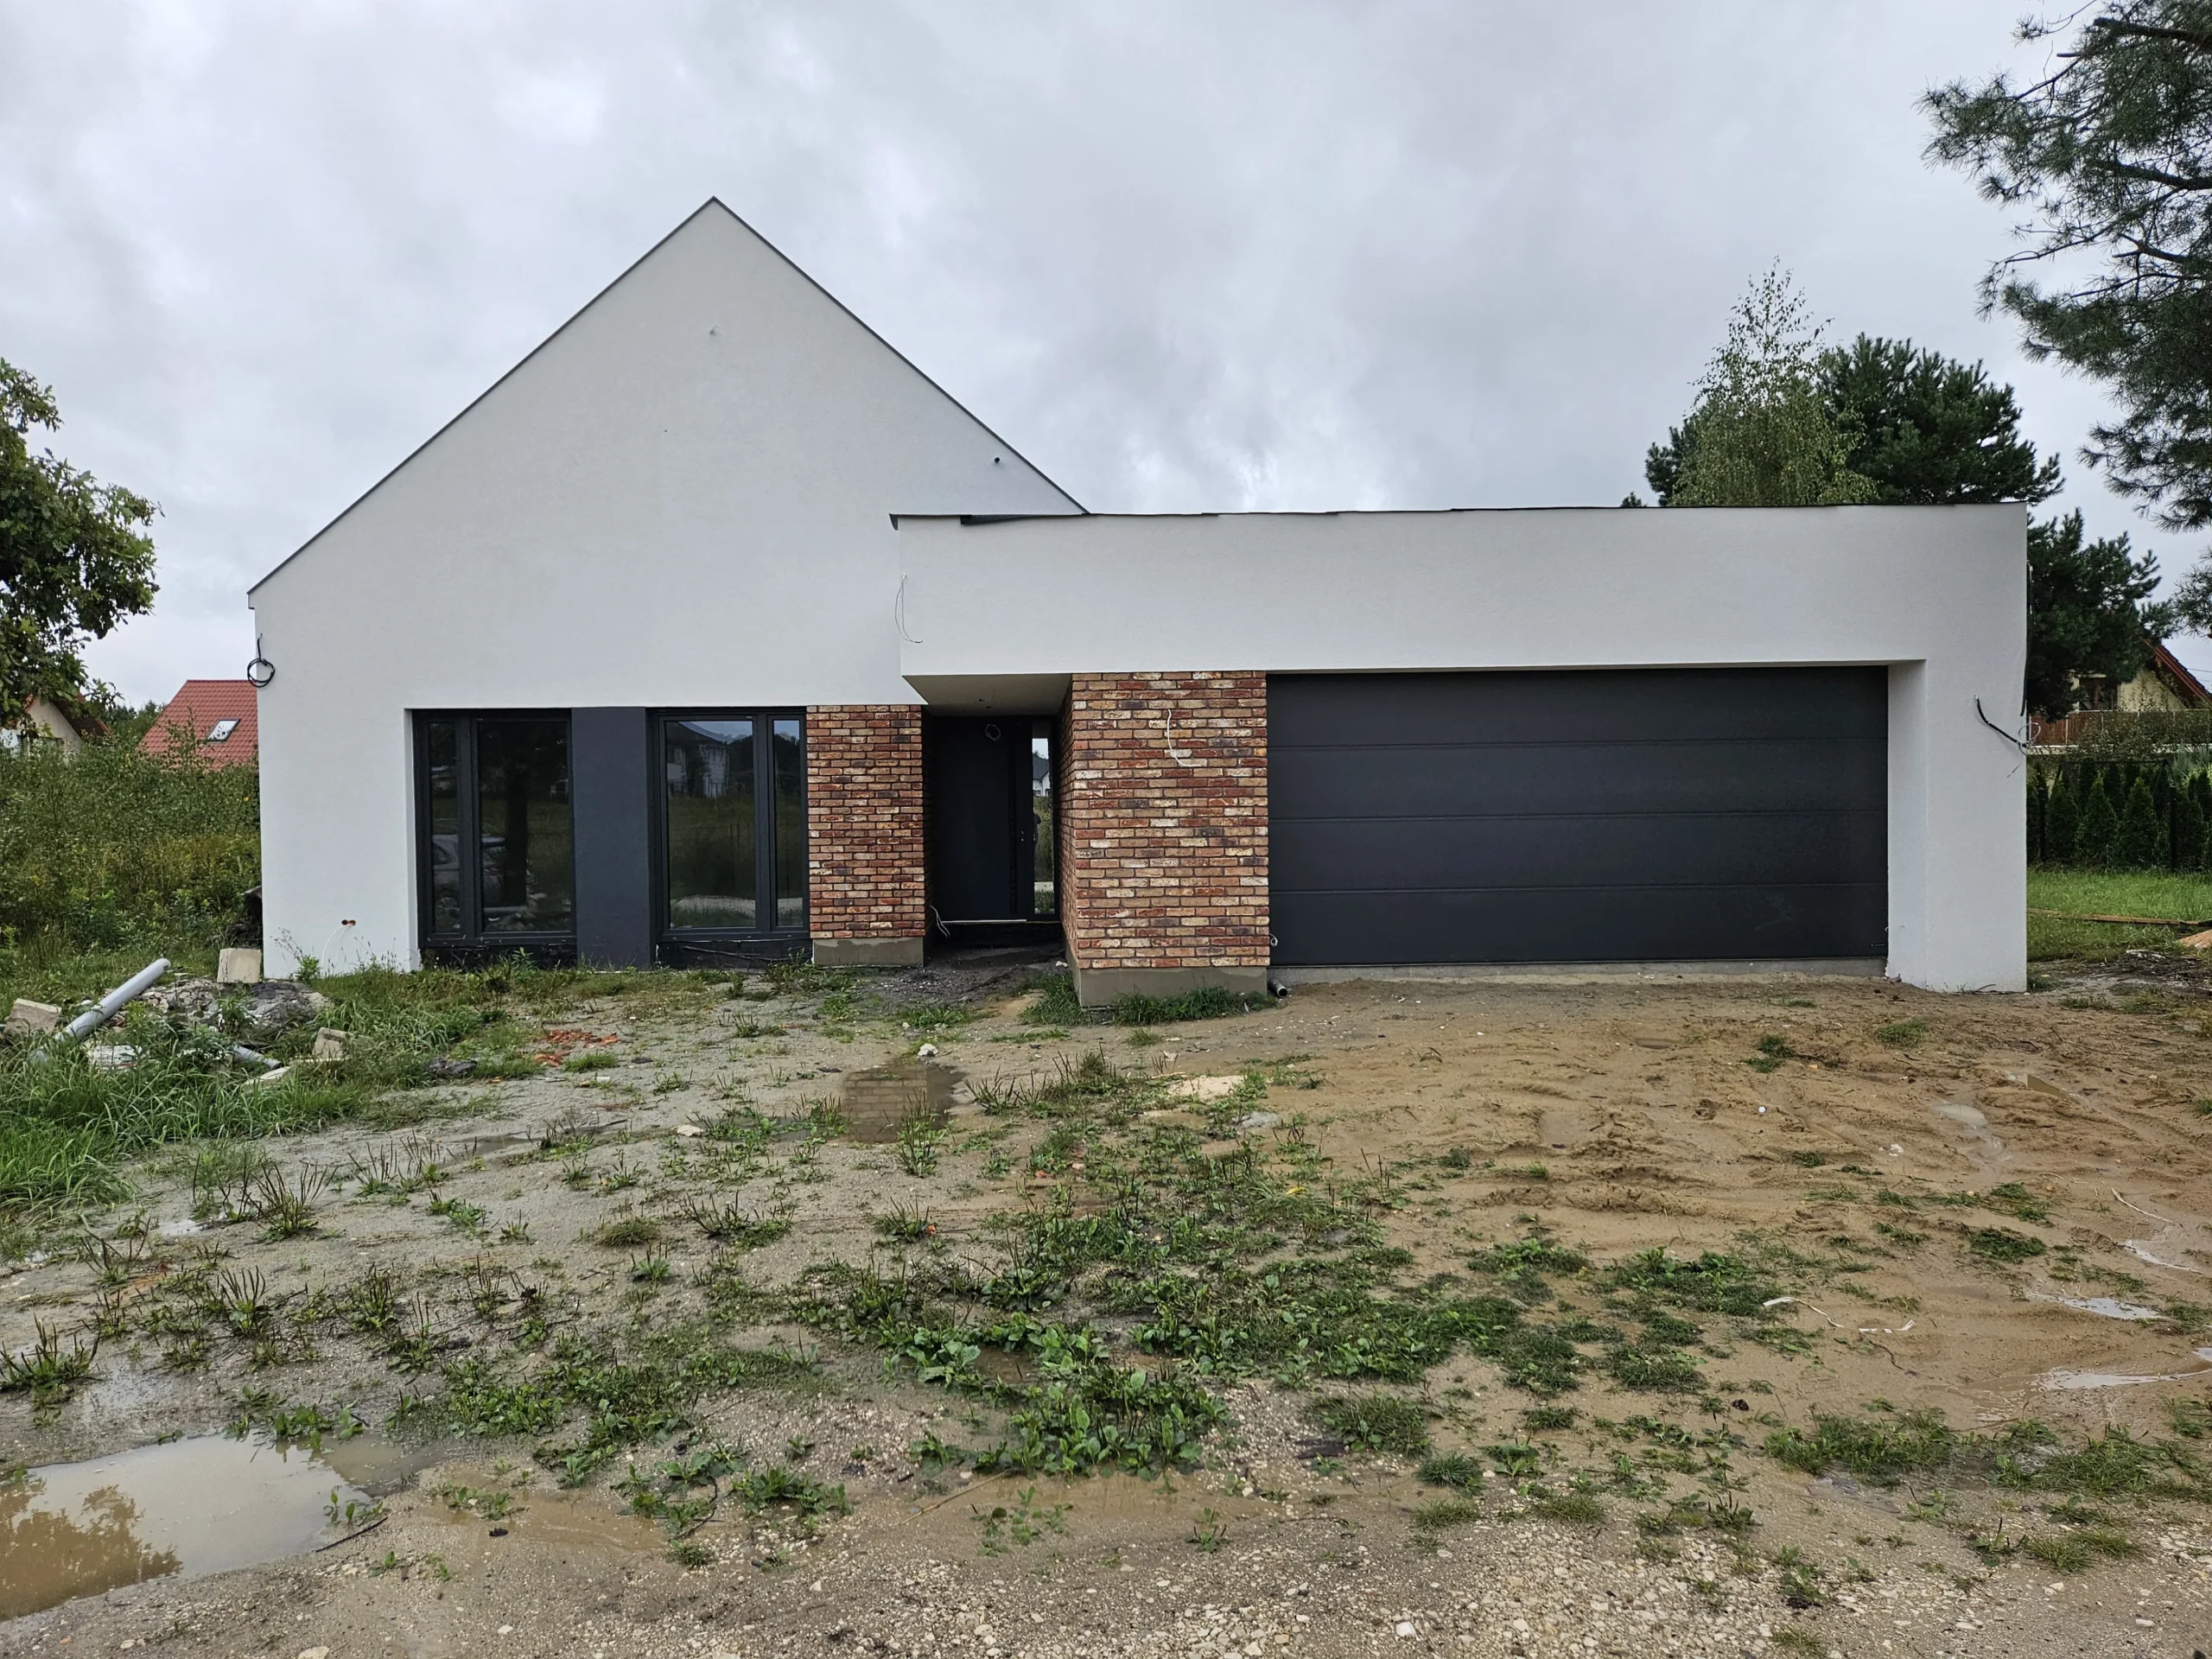
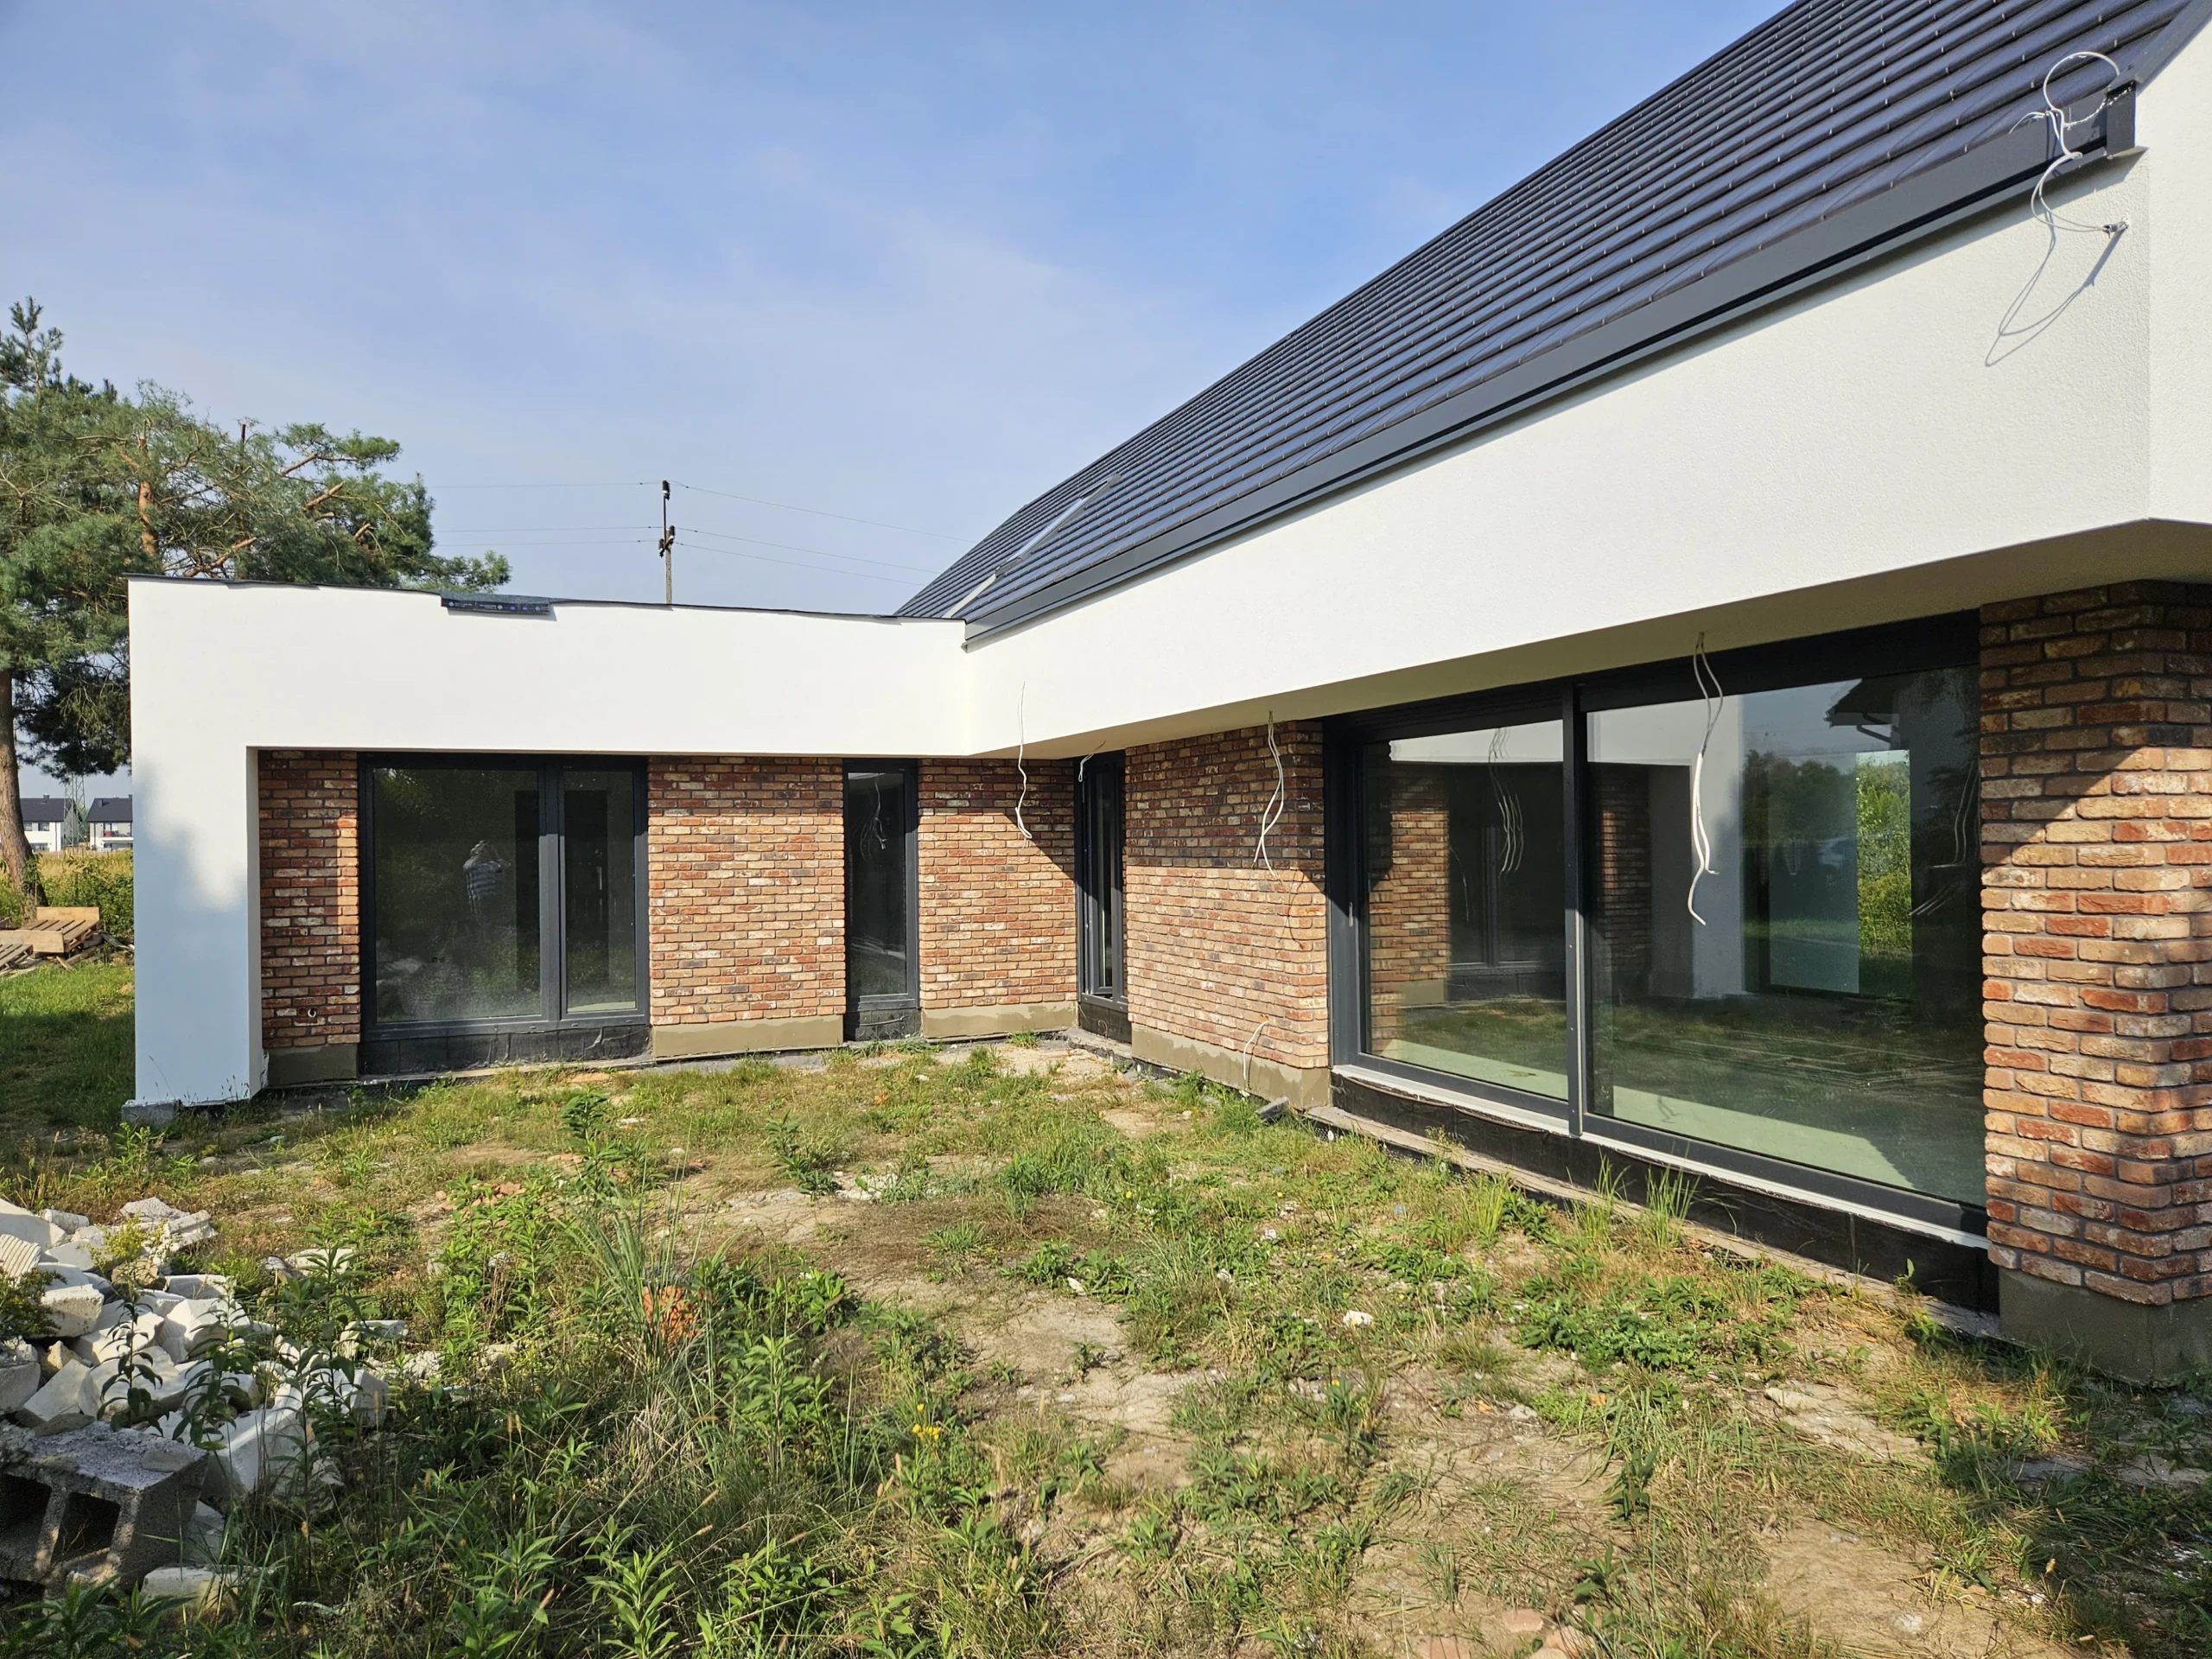
Various types of plasters can be used, such as traditional, acrylic, mineral, or silicone, depending on the desired effect. In this project, clinker tiles were also used as the facade material. Clinker tiles are mounted using adhesive or cement mortars. For outdoor installation, frost-resistant mortar should be used.
Once the mortar has dried (according to the manufacturer’s instructions, usually after 24-48 hours), the joints should be filled with an appropriate grout designed for clinker tiles.”
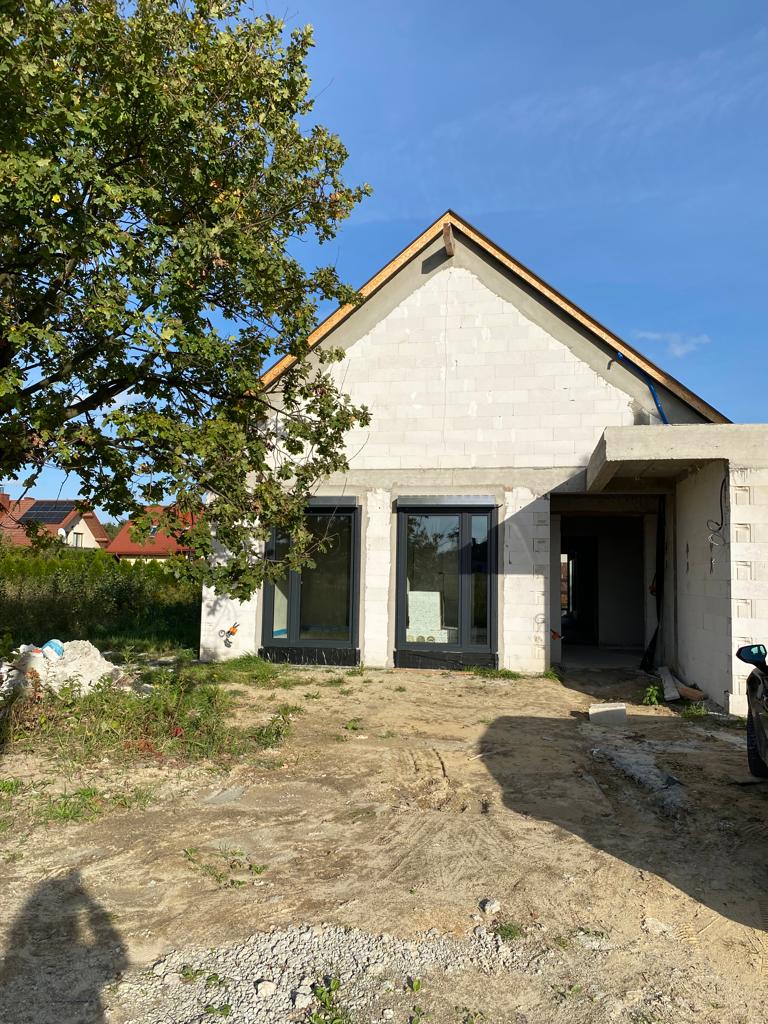
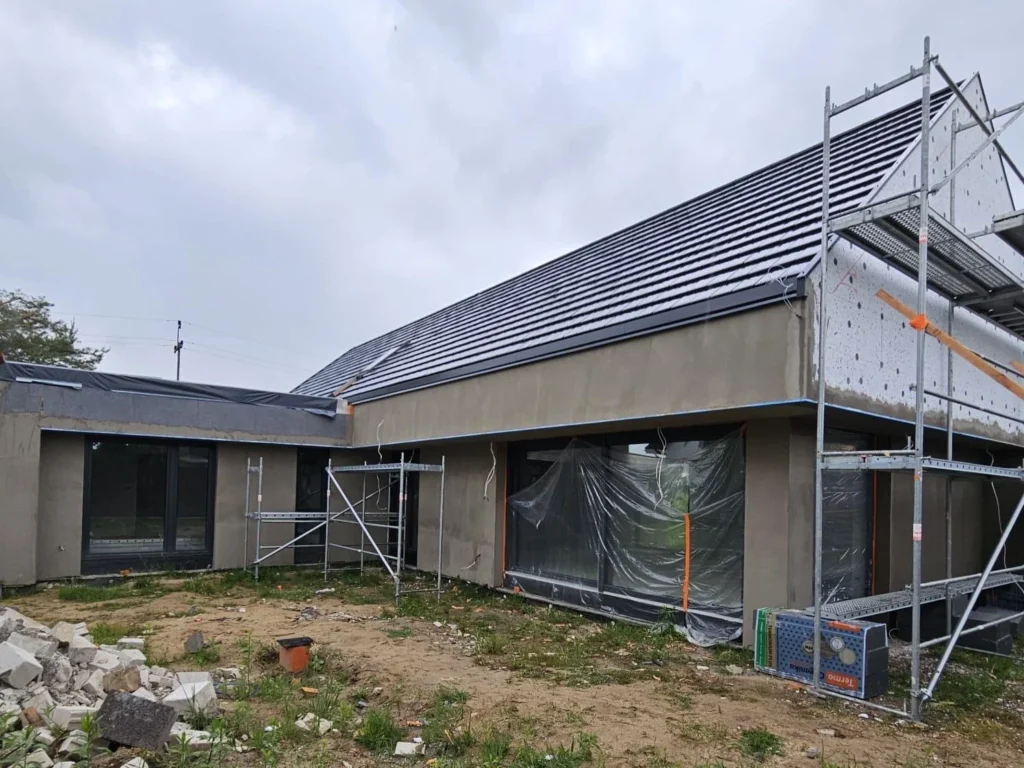
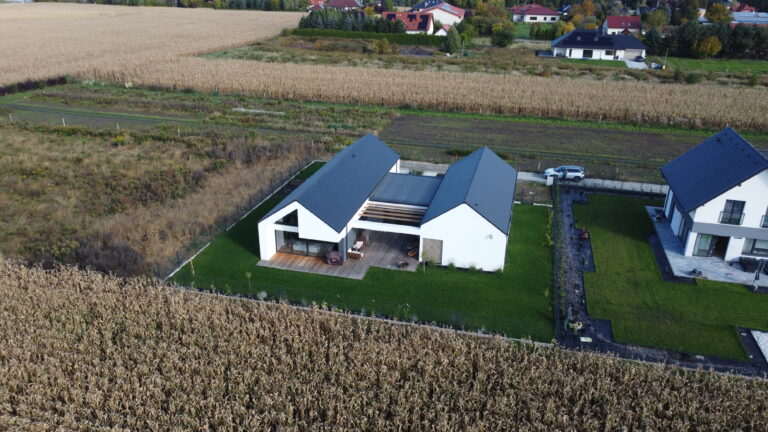
Completed Facade

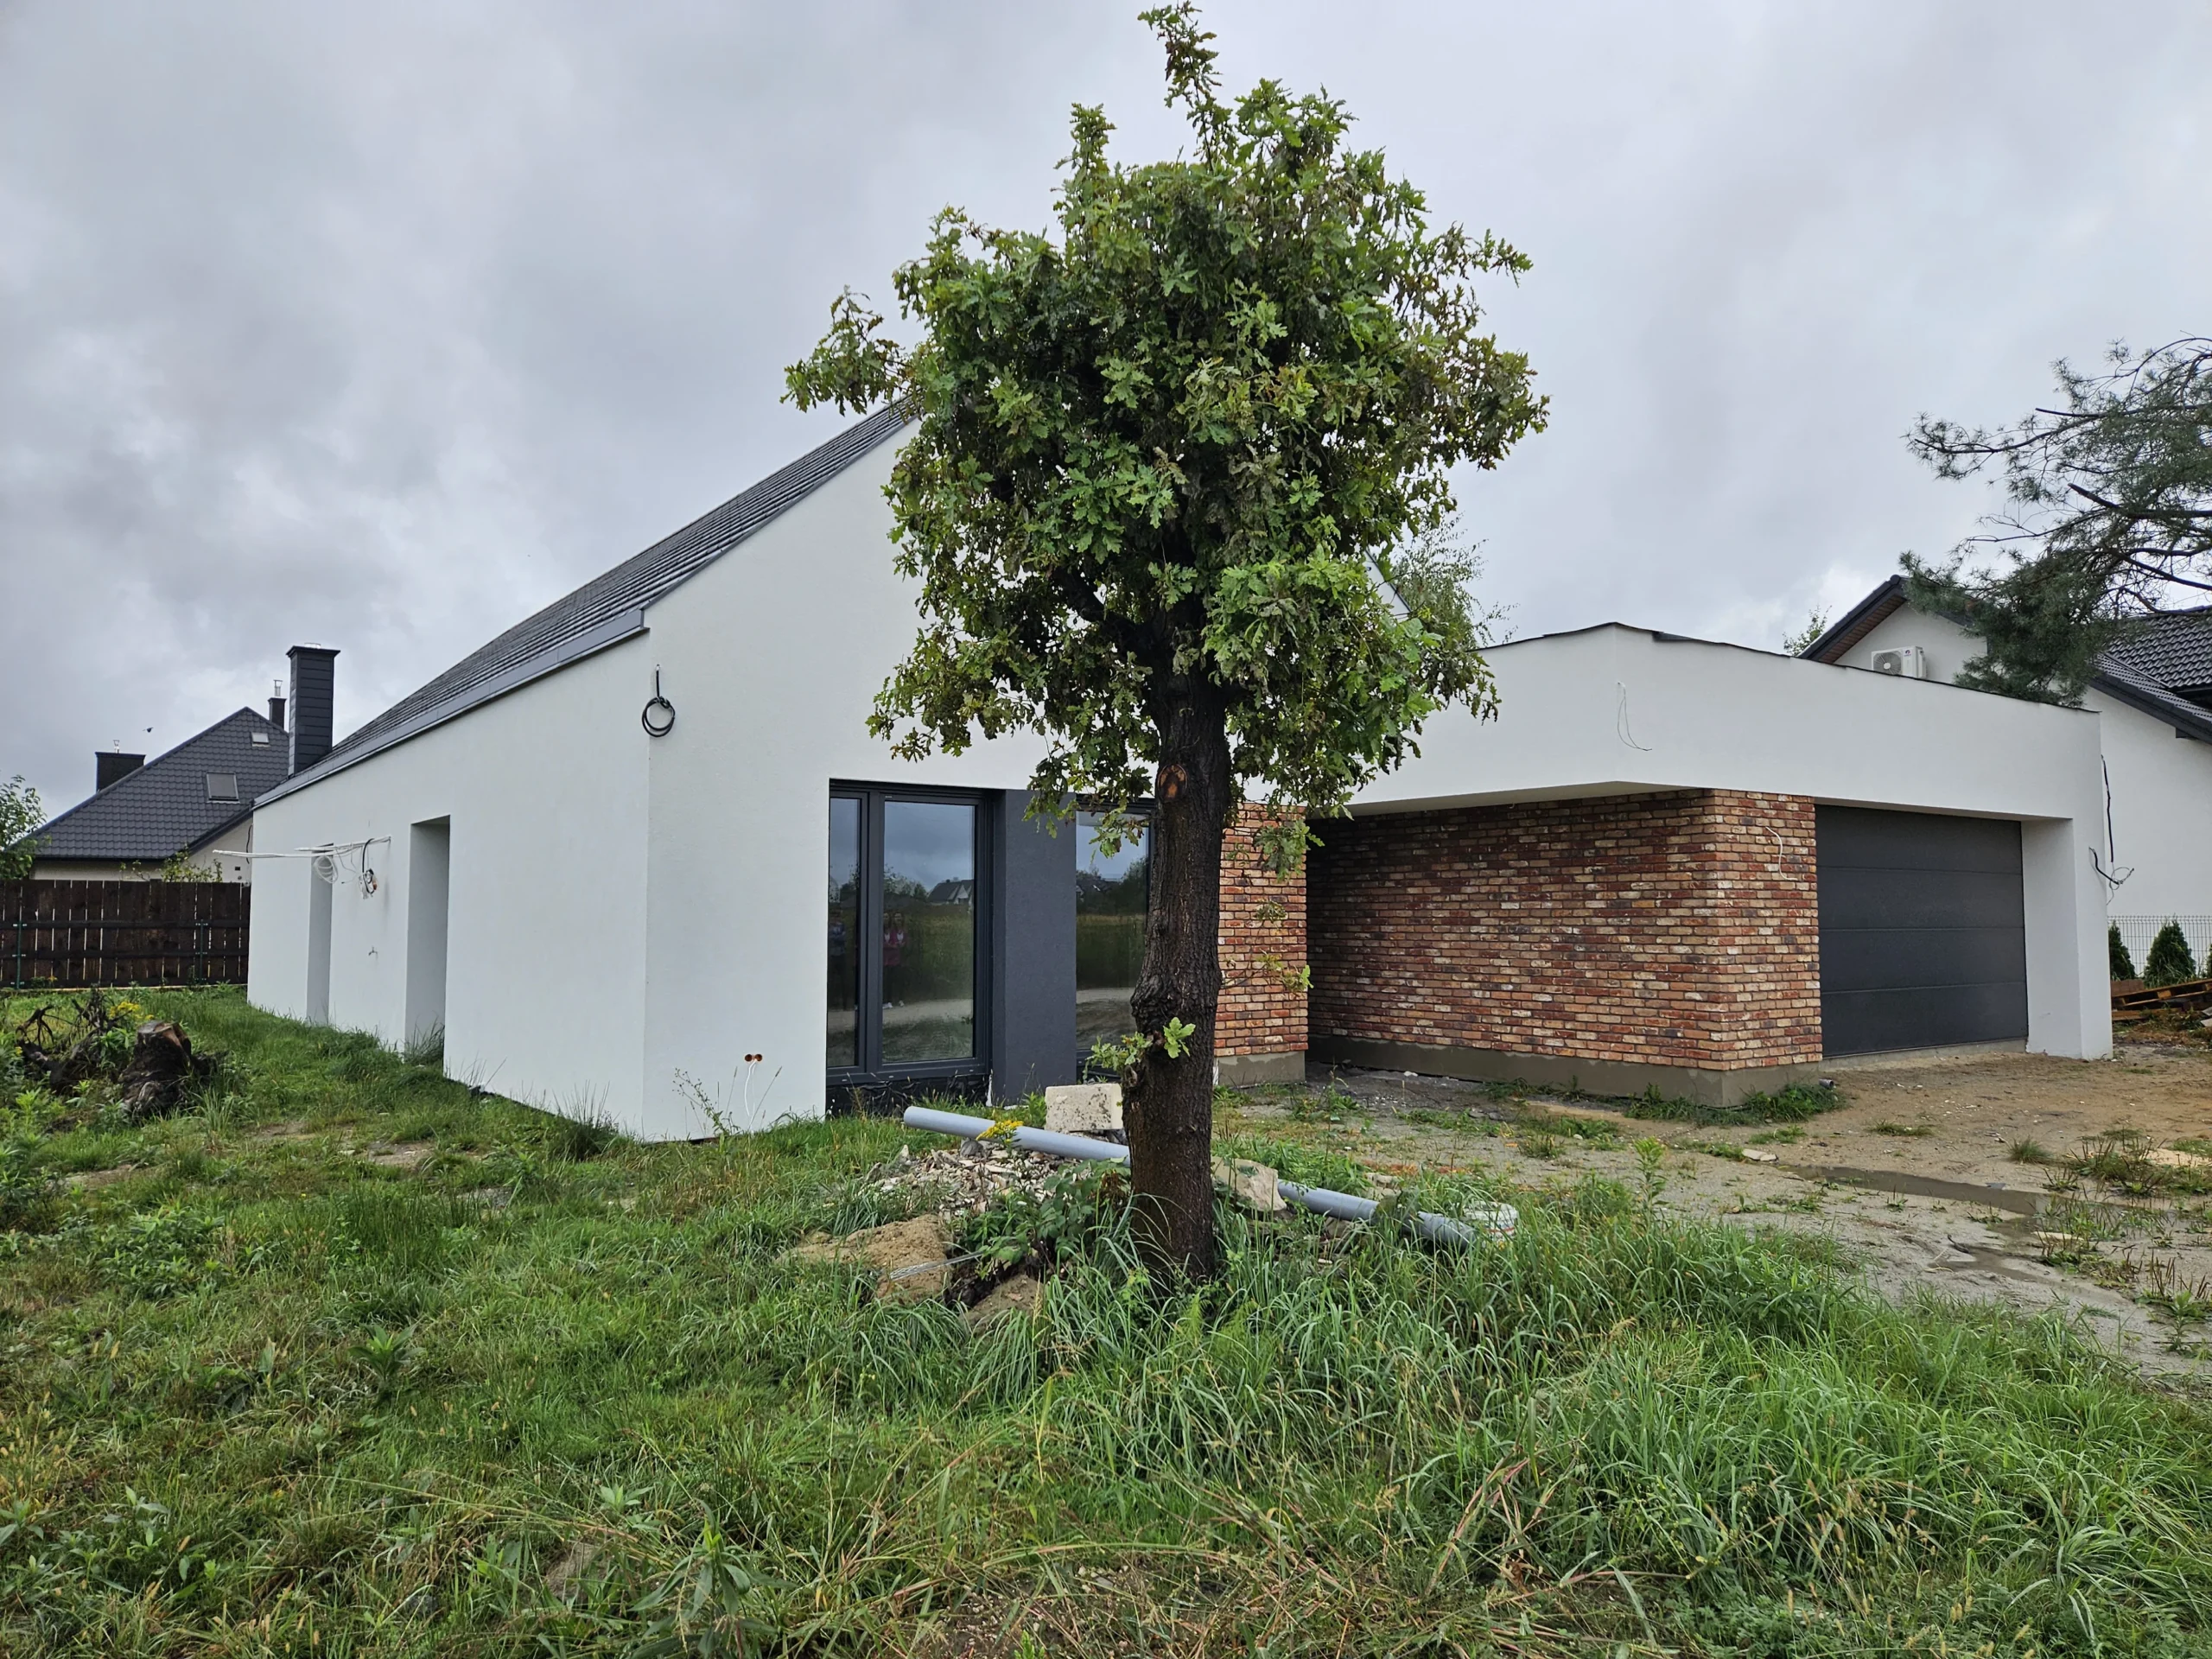
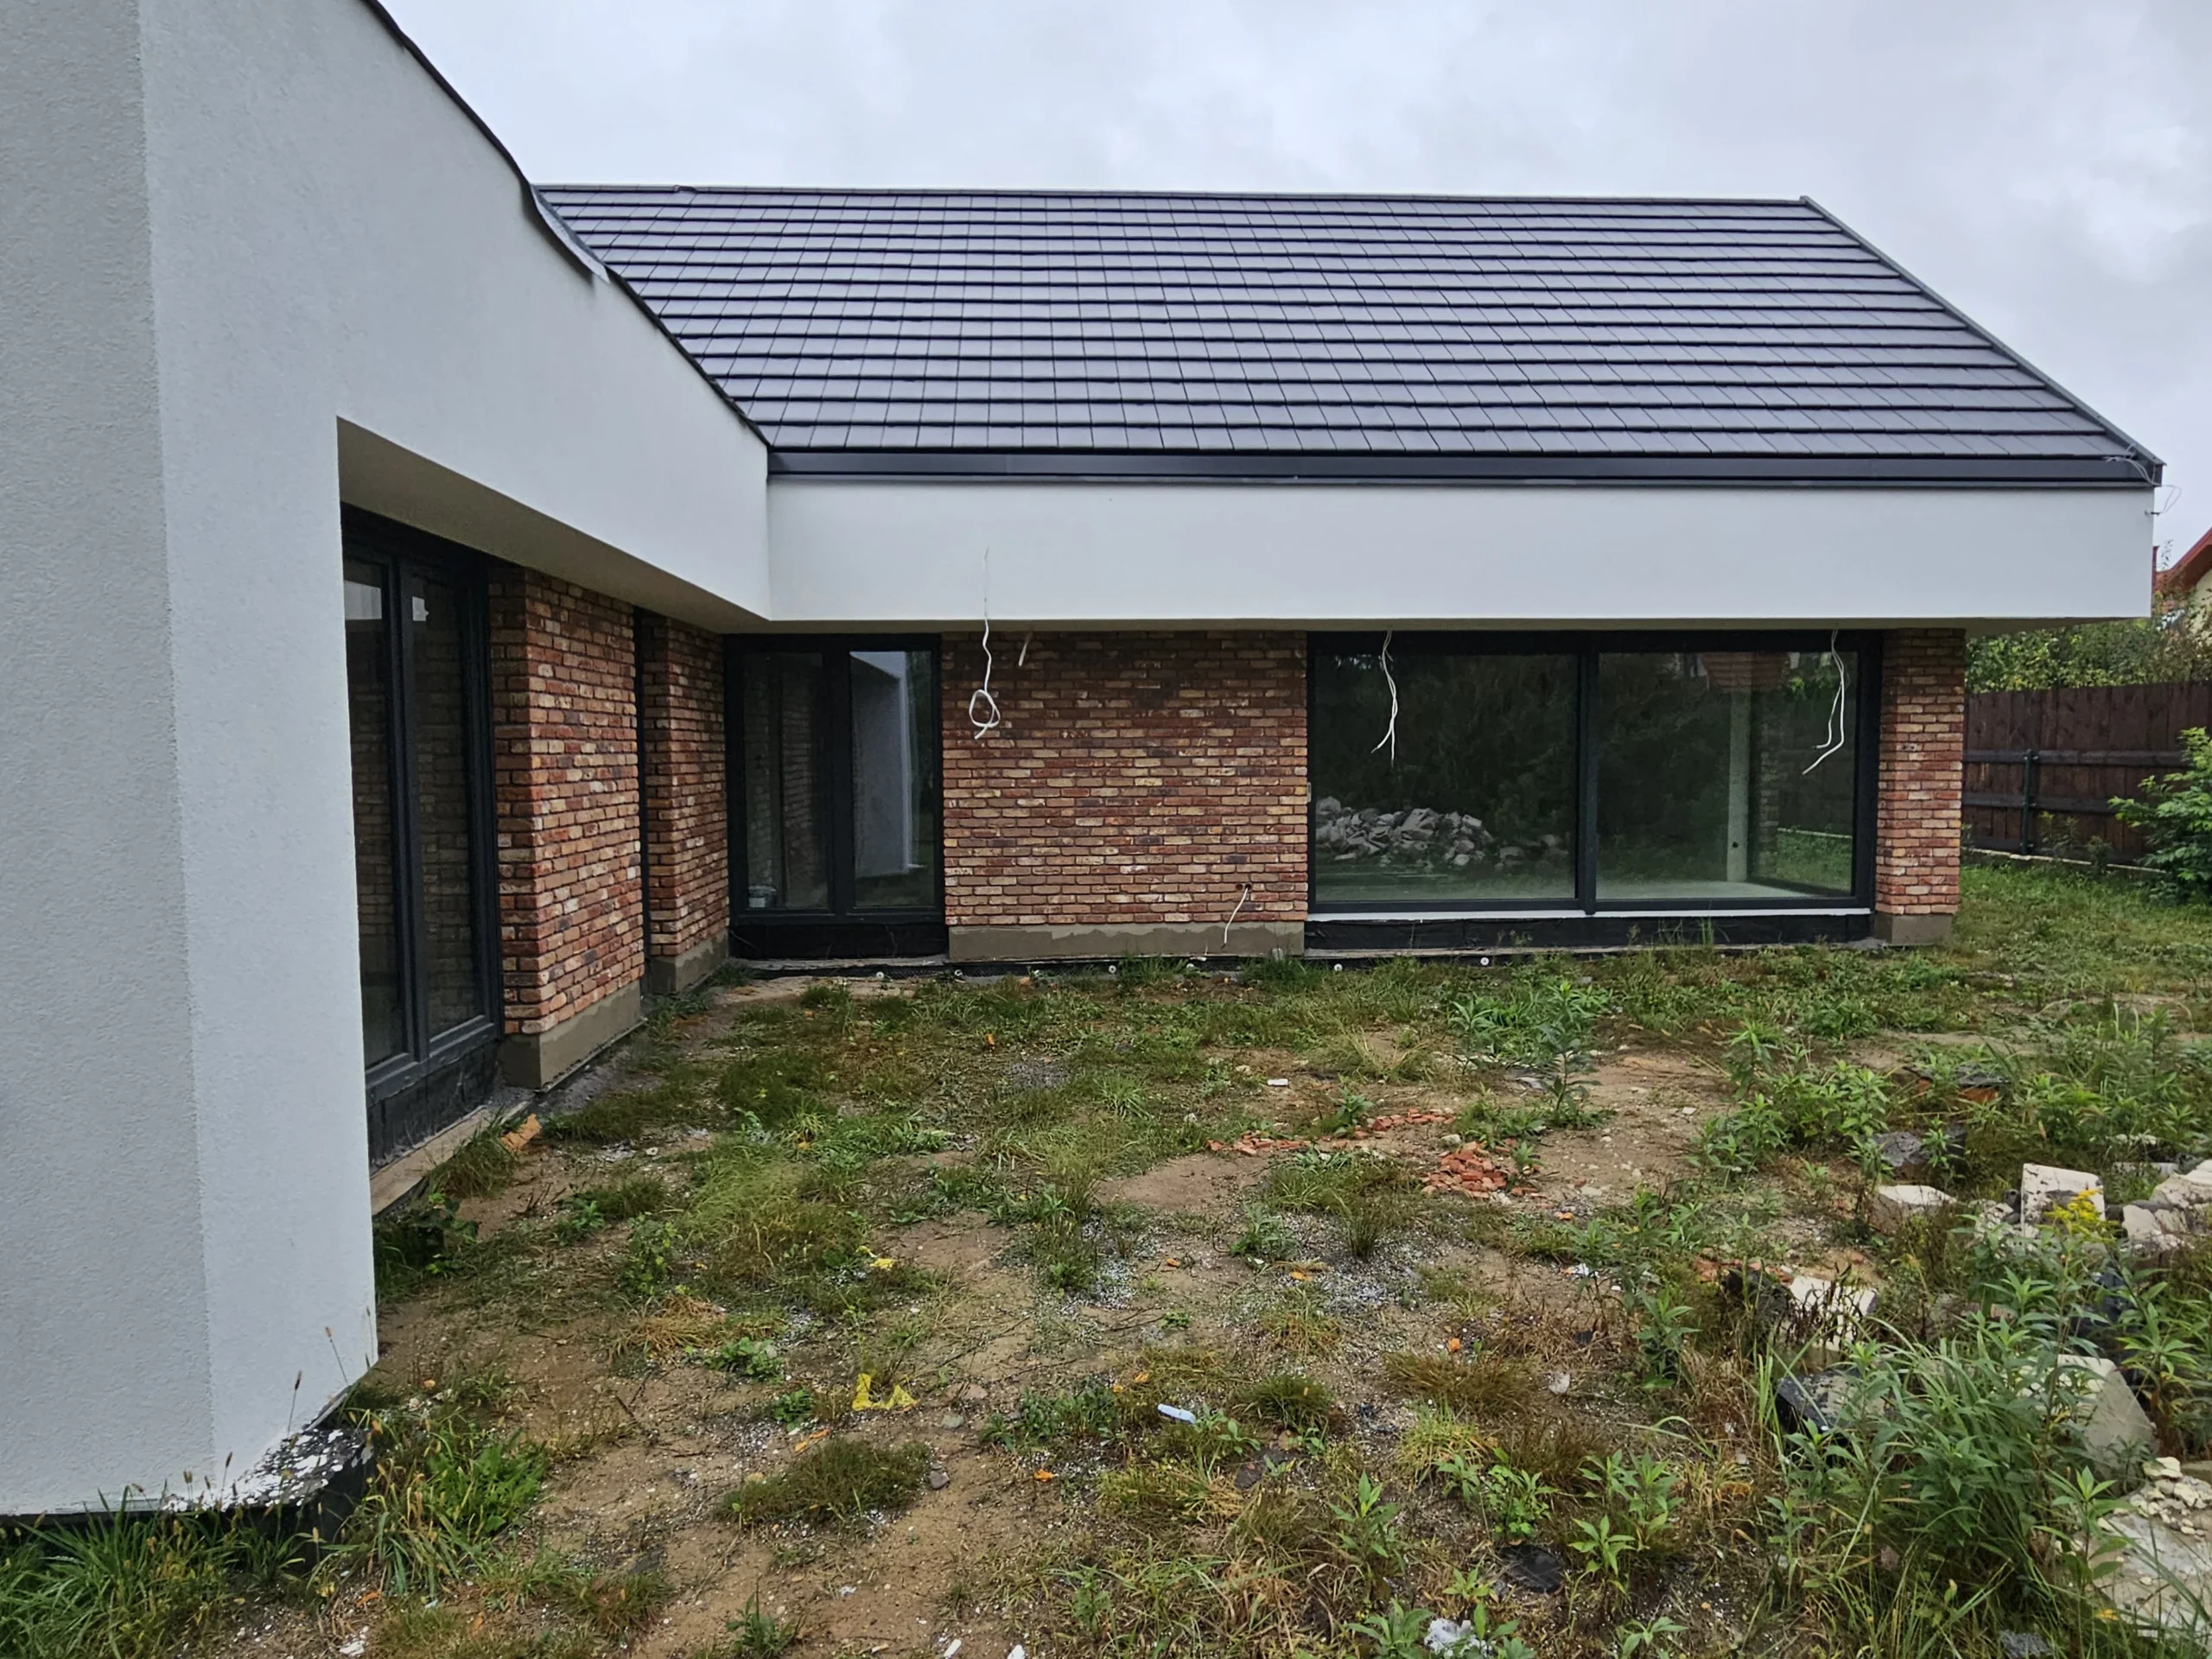
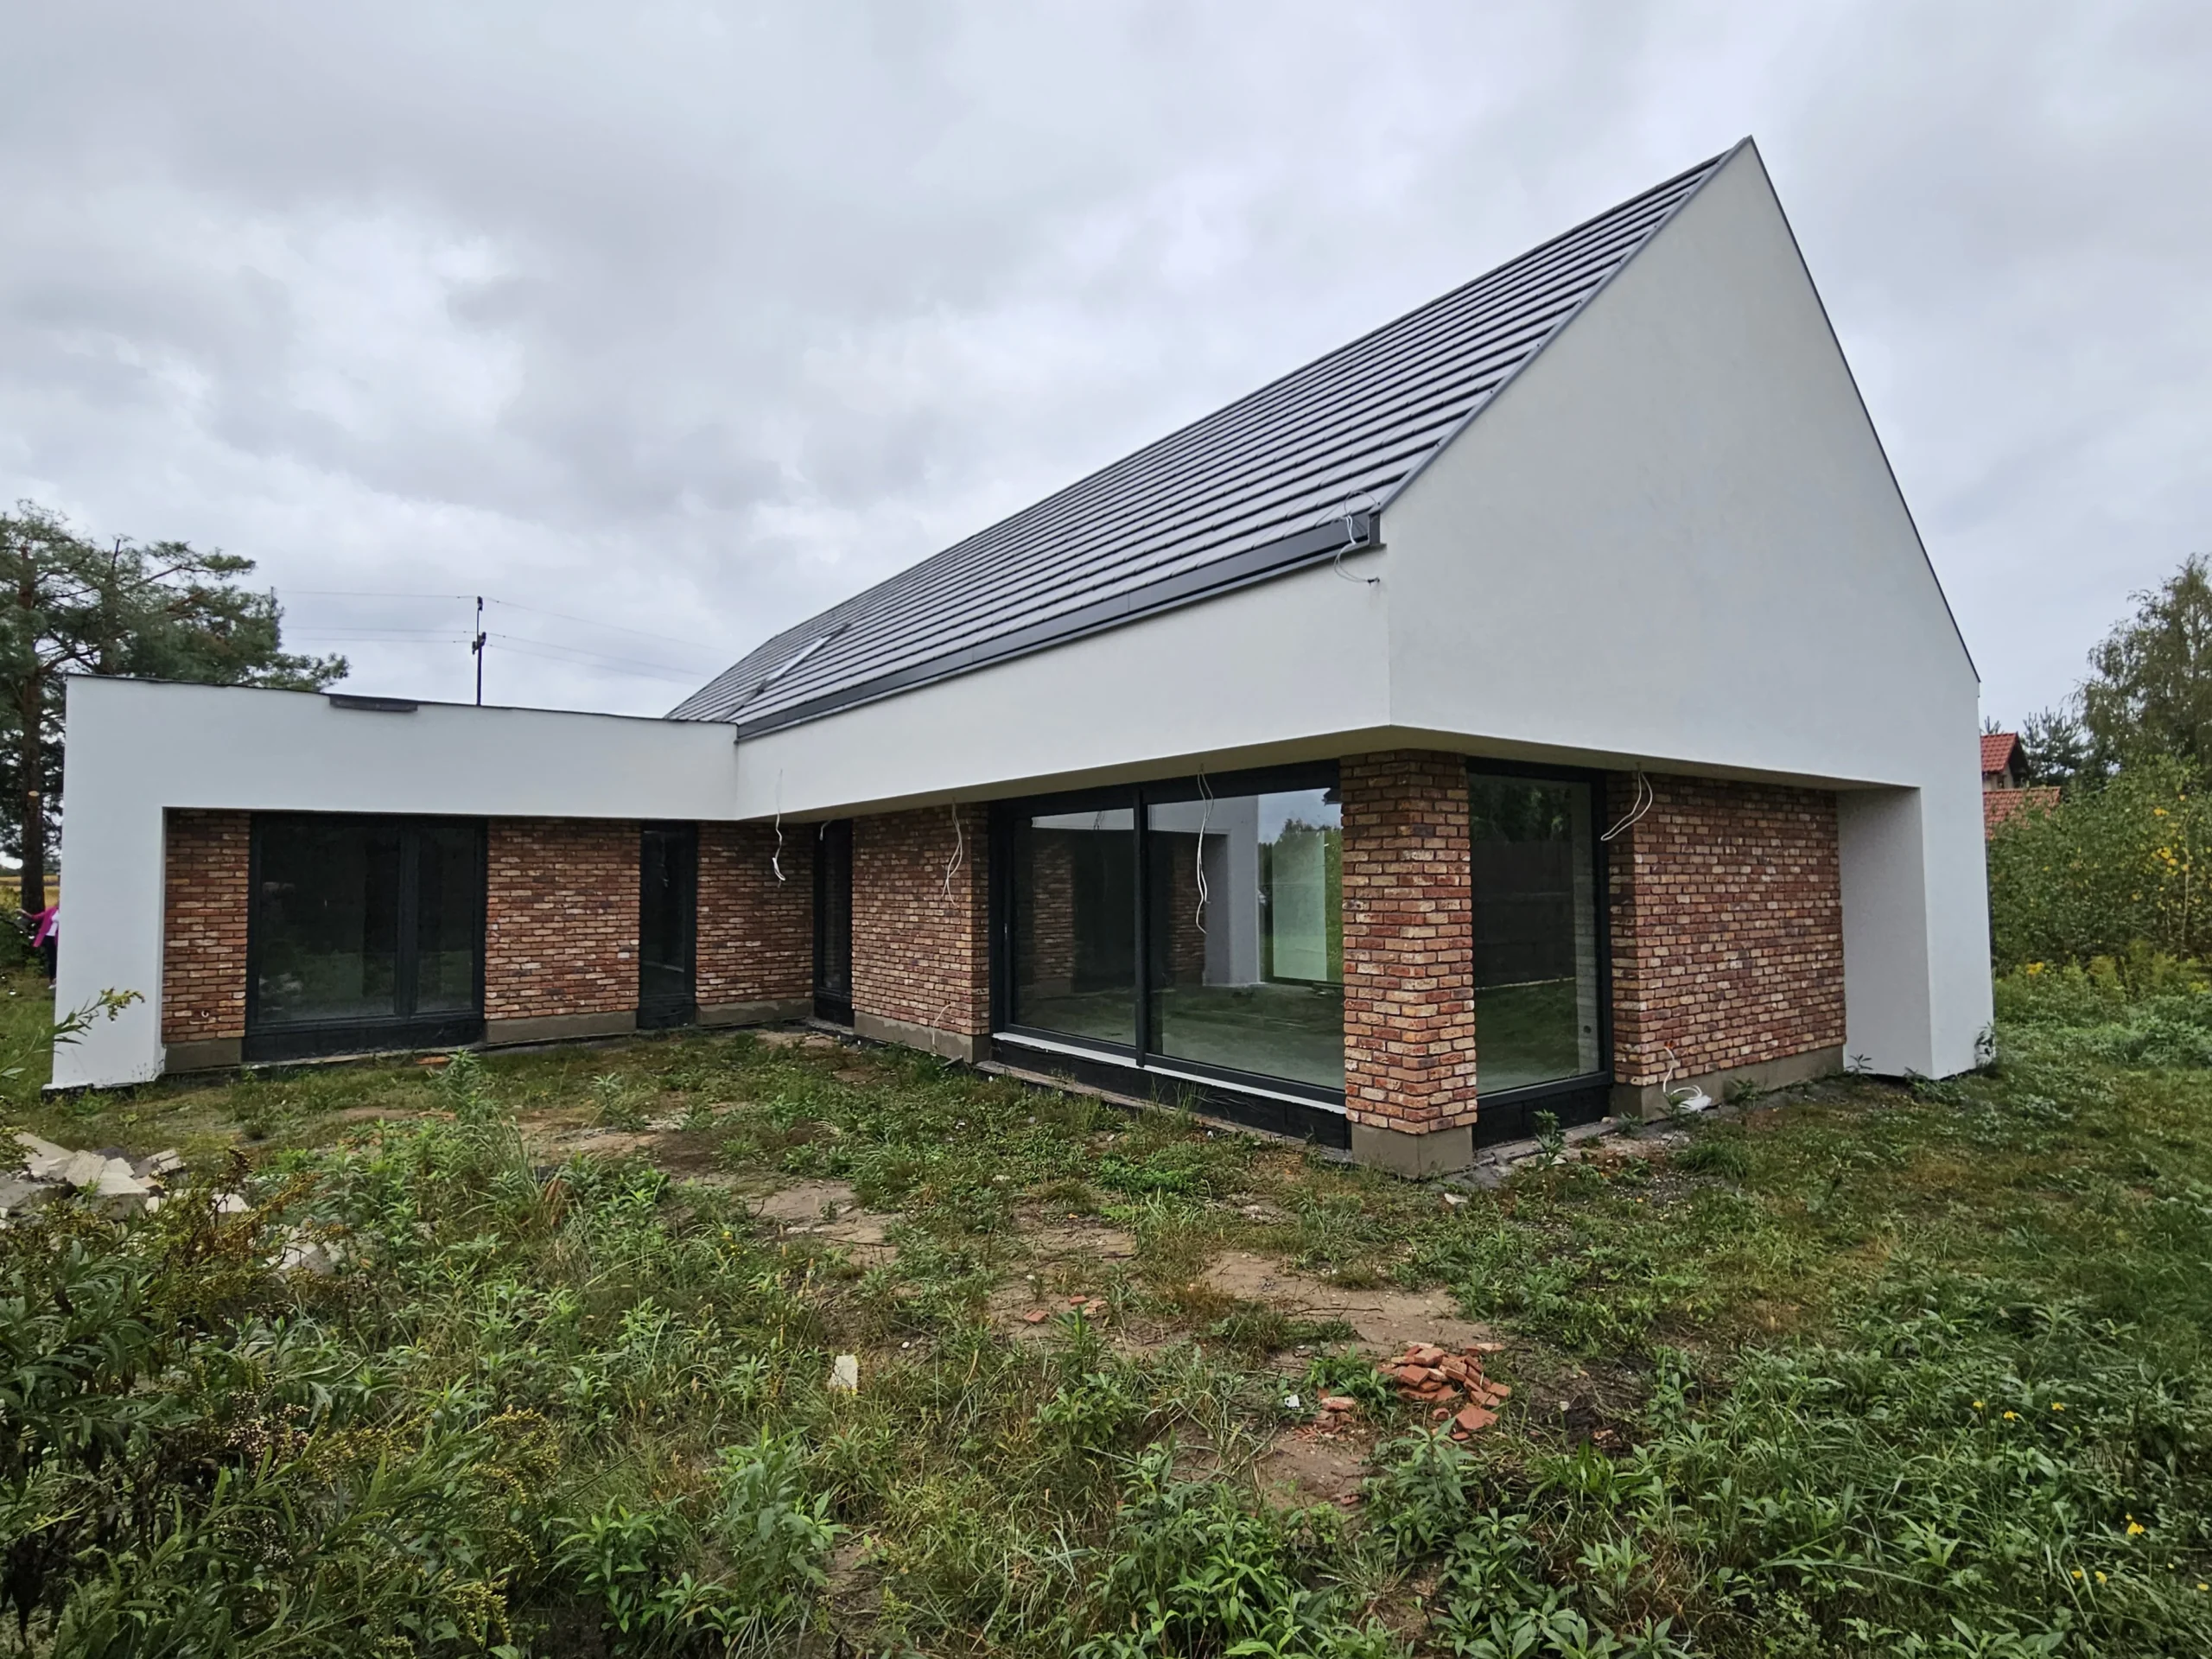
The building is ready; only the installation of lighting and paving around the building remains. What do you think? If you have any questions, we encourage you to leave a comment.
You may also be interested in:
Completed Barn House Double
Completed Barn House Double is design according to the Barn House Double Project. This is a relatively new design for a bungalow that has garnered […]


Leave a Reply